Bookshelves on the wall are the most popular way to store books and prints. Today, they can easily be purchased at any furniture store, but much more interesting and beautiful are the do-it-yourself shelves.
Kinds of bookshelves
Each year, designers come up with new options for shelves. However, all of them can be divided into several large groups. Being guided by this information, it will be easier for you to make a choice of a suitable furniture.
- Classic. This is the most popular type of bookshelf. They are simple, practical, easy to install. They can have a different shape: square, rectangular, triangular, etc.
- Suspended. The structure is fixed on the wall with vertical posts or cables. Creative designers also use straps or ropes for fixing.
- Corner. Corner shelves are fixed on two adjacent walls. Very often they are used in bathrooms and in the kitchen. They allow the hostess to save precious space.
- Outdoor. Shelves have floor support. They take up quite a lot of space, so it’s appropriate to use them only in large rooms.
- Closed and open wall shelves. If you want others to admire your book collection, you should pay attention to the open shelves. In other cases, it is appropriate to hang a closed shelf on the wall, which will protect the books from dust and dirt.

Bookshelf made of wood on the wall do it yourself
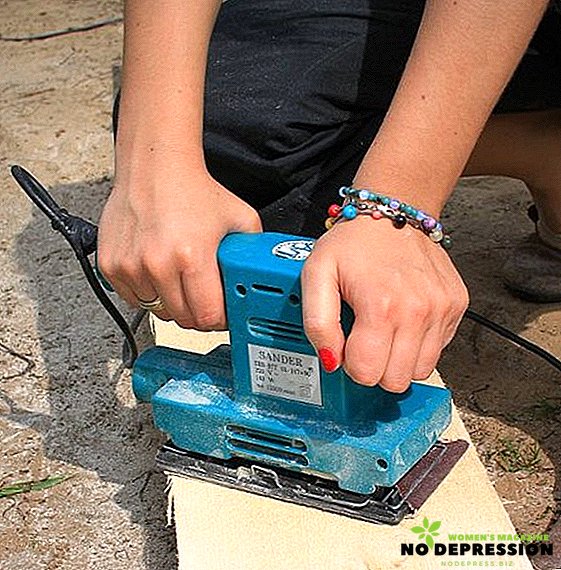
Wood is a noble material that is used to make furniture for hundreds of years. It is convenient to work with him, so in the home workshop you can easily make this shelf:

Necessary materials:
- drill;
- stain;
- varnish for wood;
- Sander;
- hacksaw;
- building level;
- ruler with a pencil;
- board 16 mm wide;
- dowels, brackets, screws.
Master class with step by step photos:
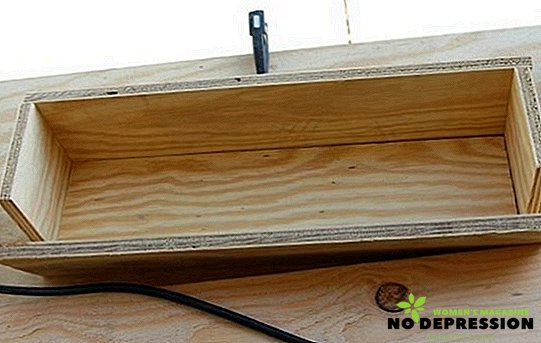
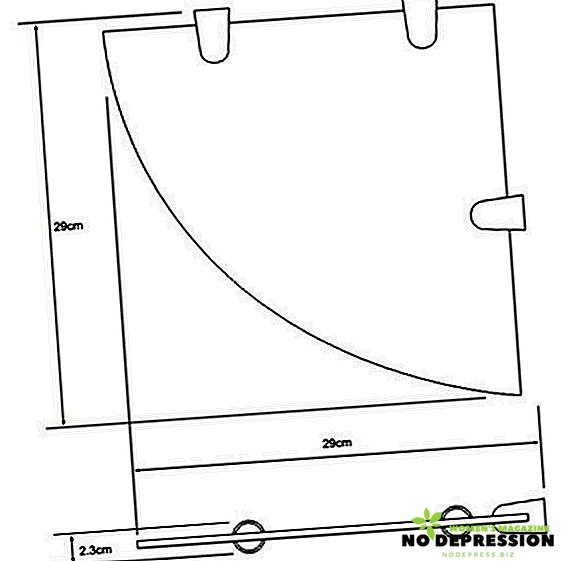
- Lay the board on the table, make the markup, according to the drawing. The height of each side wall should be 268 mm. To the height of the wall, you must add the thickness of the board multiplied by 2. As a result, you will get 300 mm.
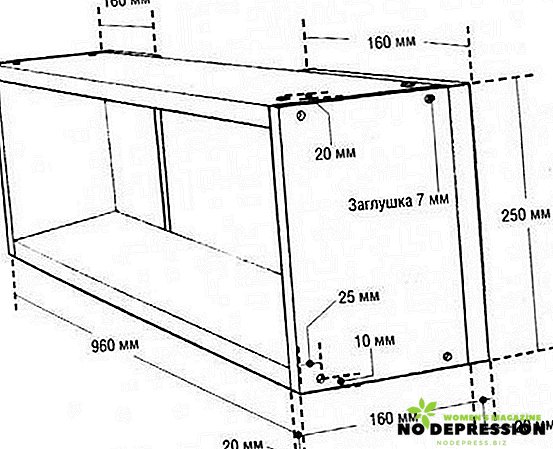
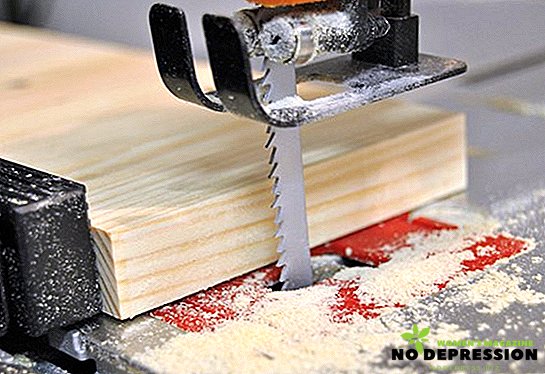
- After drawing a marking it is possible to start sawing. An electric jigsaw will help you to get perfectly even sections. In conclusion, you should have 2 short and 2 long blanks.
- Treat each blank with a grinder, coat with wood stain and furniture varnish. If then you plan to paint the furniture, then additionally process the workpiece antiseptic primer.
- Assembling the product: Lay the bottom board on a flat surface. Back down 8 mm from each end, draw 2 straight lines (parallel to the cut). Put 2 points on each line, drill holes. Prepare the top blank in the same way. Put 2 short boards on the bottom blank, insert self-tapping screws, twist them. Attach the top blank, secure with screws. Lock the brackets on the ends of the side boards. Make holes in the wall, insert screws (they should be 5 mm above the wall). Fasten the brackets to the fasteners, hang the finished product. Optionally, the shelf can be made closed, that is, insert glass into it.


How to make a bookshelf on a wall with glass
The glass shelf will ideally fit into any interior. It is beautiful, original, does not "steal" the space at the expense of transparent parts.
Necessary materials:
- silicone gun;
- Double-sided tape;
- sandpaper;
- meter;
- scissors;
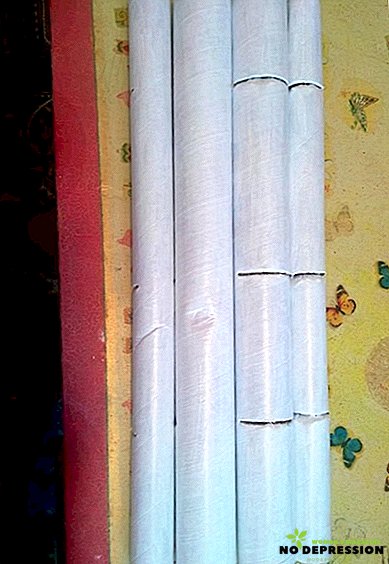
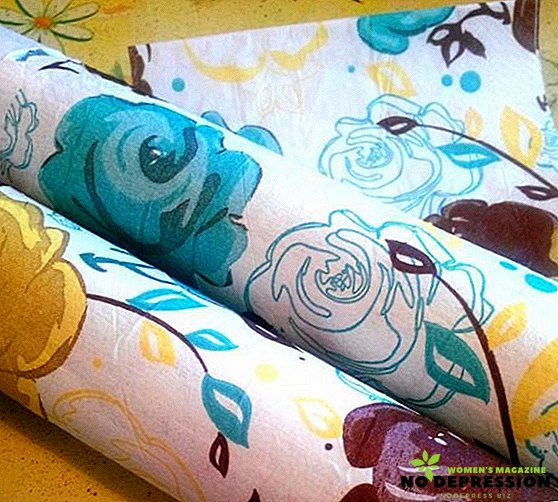
- reels of oilcloth;
- three glasses;
- stationery knife;
- ruler;
- acrylic paint;
- pencil;
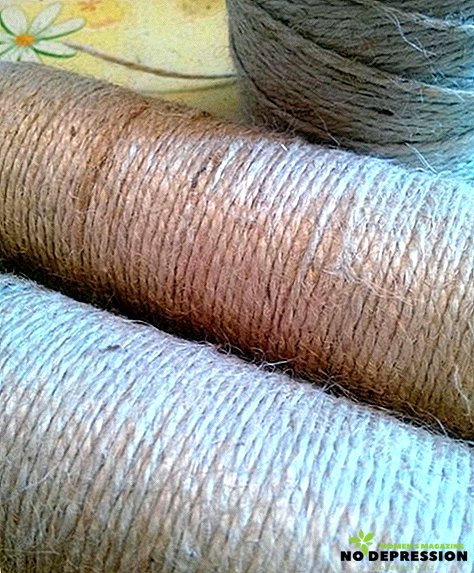
- twine;
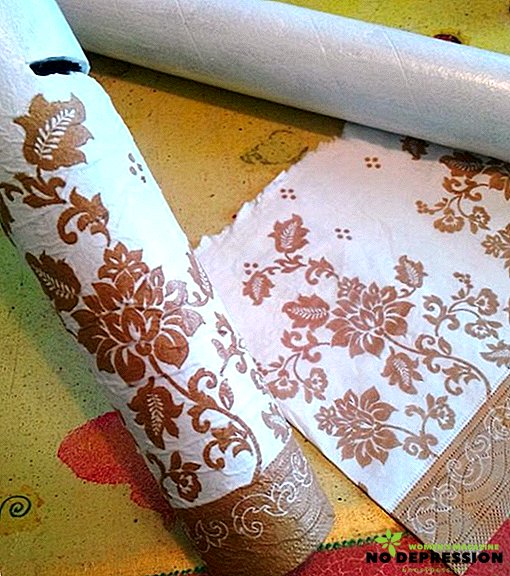
- napkins;
- decor;
- stencil.
Instructions with step by step photos:
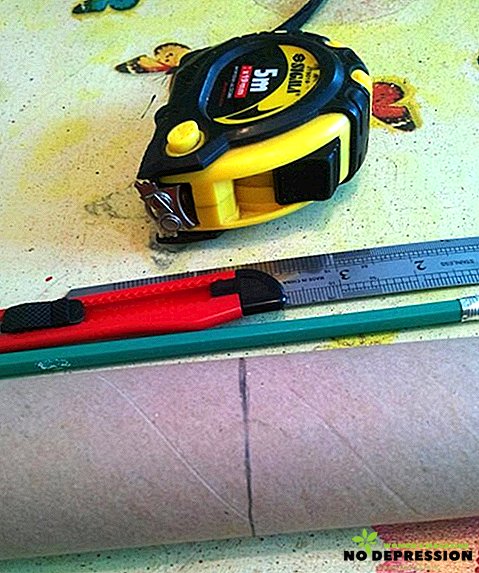
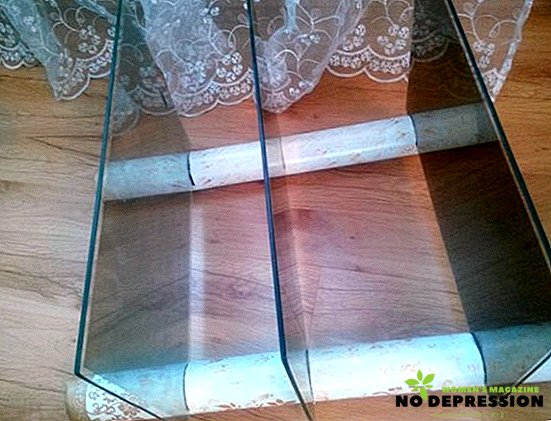
- Take a reel, measure the required length, mark with a pencil, cut out with a clerical knife. It is necessary to cut not completely, but only in half a circle.
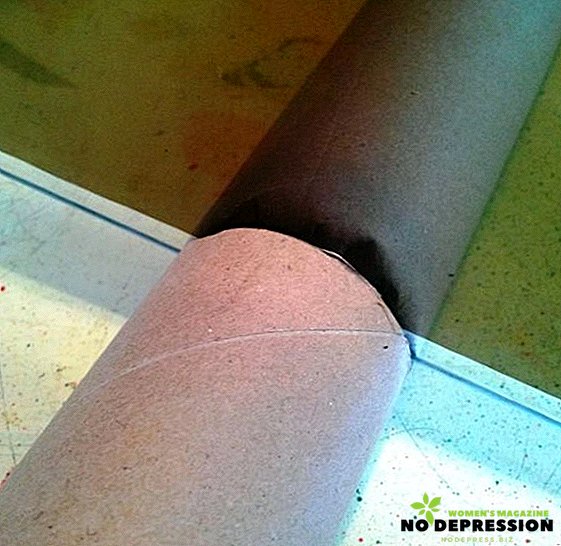
- Slide out the slot with a ruler and place the glass here. Repeat this movement the necessary number of times. The picture has 4 legs with 3 holes each.
- Paint the legs with white paint. Make a few layers to keep the paint better.
- Decorate the bottom of the legs with decoupage napkins. Do not pursue perfect gluing. You can glue napkins even with folds - they will not be very visible on the finished product.
- Wait until the paint dries, clean the surface with fine sandpaper.
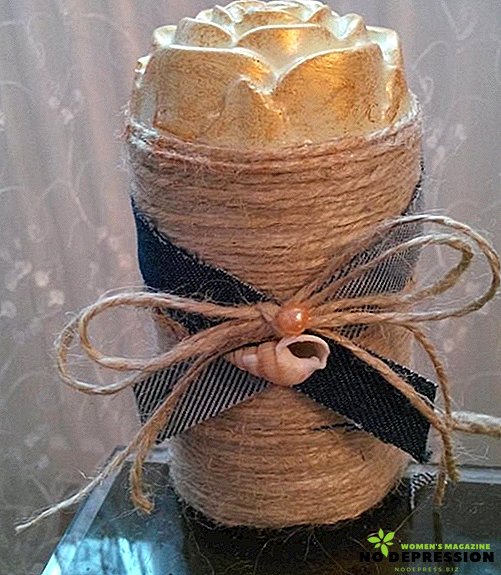
- Wrap the legs with double-sided tape, wrap with twine.
- Using the decoupage napkin, decorate the last but one opening.
- Wait for it to dry completely and sand it. 2 front legs are ready.
- The rear legs will not be very visible, so they do not need special decor. It is enough to decorate them with gold paint and stencil.
- Cover the decoupage parts with several varnishes.
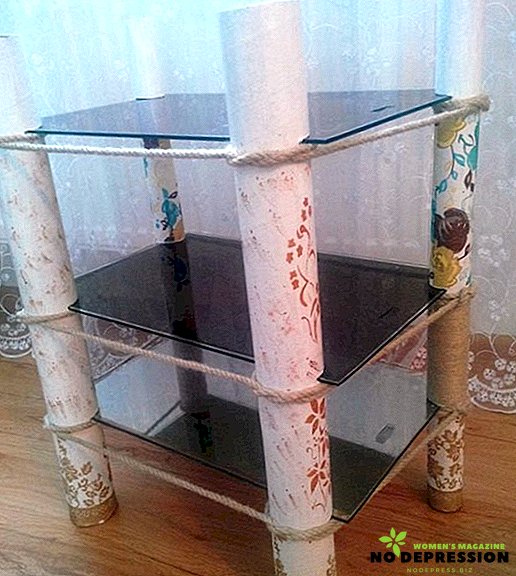
- Assemble the pieces of the shelf. First fix the glass on the rear legs, then - on the front legs. Tie the legs tight. It will strengthen the structure, make it more beautiful. Glue the parts with silicone tape.
- Rear legs wind flagella, decorate with flowers made of plaster.
- Shelf can be put on the floor or hang on the wall. In this case, you will need to additionally attach fastener parts to it.


Corner bookshelf on the wall: master class
Corner shelf on the wall saves space, so designers often use it in small spaces.

Necessary materials:
- ruler;
- simple pencil;
- level;
- screwdriver;
- boards of the required size;
- hacksaw;
- varnish or paint;
- fasteners;
- level;
- electric drill.
Step by step production:
- Make the necessary markup, according to the scheme. Be sure to use a ruler, a pencil and a level so that there are no deviations.
- Cut out the construction details with a hacksaw or electric jigsaw. Edge, if necessary, sandpaper work so that they turned out smooth and smooth.
- Grind the cut parts in addition, fasten with fasteners.
- Finish the finished shelf stain, varnish, paint, hang on the wall.

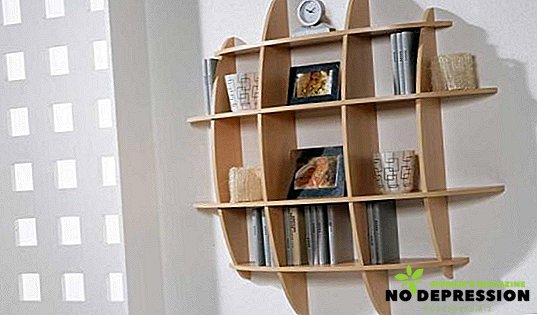
How to make an unusual shelf on the wall: master class
An ordinary wooden shelf on the wall will not surprise anyone. If you decide to make repairs, be sure to make the original bookshelves. They will carry not only functional, but also decorative load.

Necessary materials:
- board with a thickness of 2 cm;
- saw;
- drill;
- lighter;
- rope;
- steel washers;
- 2 corners.

Stages of work with step by step photos:
- Using a saw, cut the board into several pieces. You should have 11 pieces of 5 cm and 2 pieces of 6 cm.
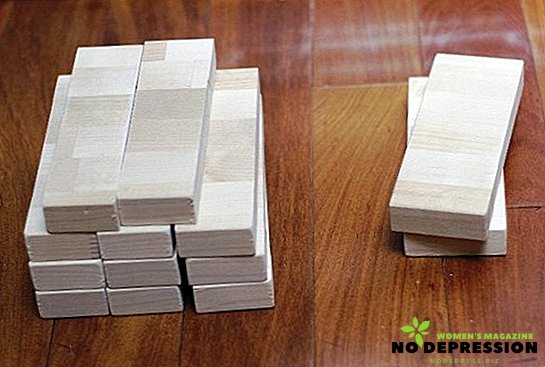
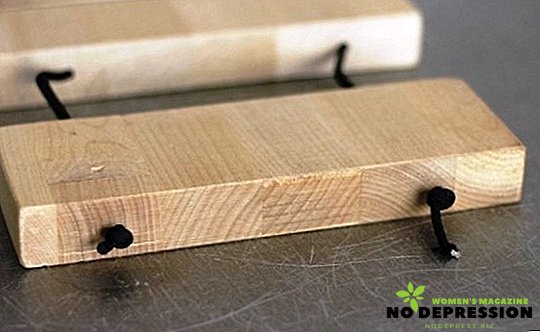
- In the resulting bars, drill holes with a drill.
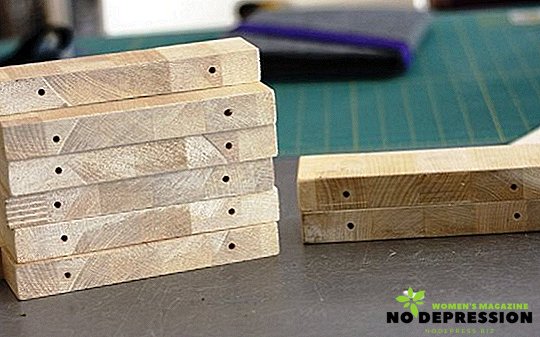
- Pull the cord through all the bars. Use small metal washers to separate the bars.
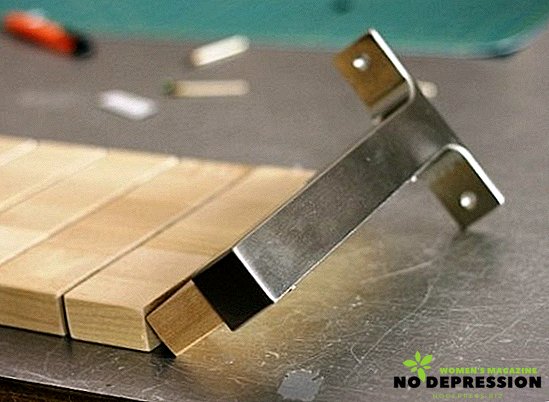
- Secure the corners and hang on the wall.


Bookshelf on the wall in the nursery: a master class
Necessary materials:
- brackets. When buying, be sure to specify the weight for which they are designed;
- plywood 15 mm thick;
- drill;
- screws with dowels;
- clamps;
- building level;
- tassel;
- varnish;
- simple pencil.

Stages of work:
- On one board, draw the silhouette of the mountains, and on the second - make a markup for cutting.
- Fix the boards on the table with clamps. Place a cloth between the clip and the board. In this case there will be no traces on the tree.
- Cut the "mountains" with a jigsaw, moving along the marked lines.
- Handle the material with sandpaper.
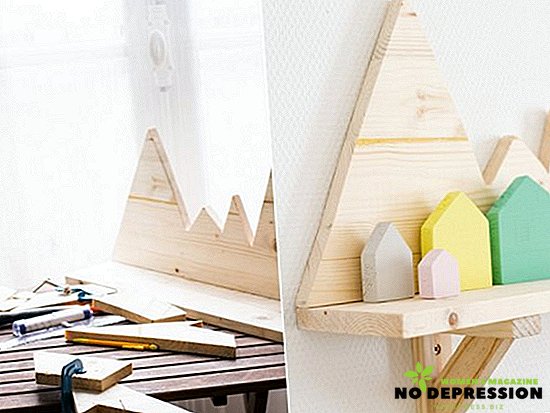
- The next stage of work is the assembly of the structure. "Mountains" attach to the shelf with screws, screws or nails. Do this as gently as possible to hide the fixing points with brackets.
- Paint the product with two layers of paint.
- While the paint is drying, fix the brackets. Make a marking on the wall, mark the attachment points. In the place of attachment, punch the hole with a center punch.
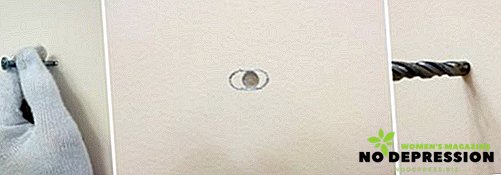
- Drill holes on the wall. The depth should be slightly greater than the depth of the dowel. Choose a dowel, based on the estimated load on the finished shelf. Drill the wall horizontally or at a slight angle.
- Insert the dowels into the holes. Hold the brackets, screw the screws.
- Secure the workpiece to the bracket.


How to hang a shelf for books on the wall
Before you hang the shelf on the wall, check: whether there are wires, gas and water pipes in this place. This can be done using special electronic detectors. After that, you can immediately get to work.
Stages of work:
- Choose a place. It is easy to determine, based on the purpose of the shelf. Take the design, attach it to the intended place of attachment, make the necessary marks on the wall.
- Determine the number of supports. As a rule, the shelves are distributed on 2 or 3 supports. The distance between the supports should not be very large so that the structure does not sag. The number of supports will depend on the length of the shelf and the total weight of the books.
- Mark the holes on the wall. Attach the support to the wall so that the top surface is level with the line you marked in the first step. Mark the location of the first hole. Level check the vertical support. Mark the remaining holes. Mark the holes for other supports in the same way.
- Choose the right screws. Their size will depend on the material from which the wall is made. What screws are suitable for your wall, prompt in the hardware store.
Photos and drawings of various bookshelves on the wall


A few more original ideas for bookshelves are in the next video.