Leisure time is interesting to spend in the family for the invention of some non-trivial crafts. This activity seems especially fascinating to children - with a great desire, they will take on coloring or gluing various elements.
Christmas crafts in kindergarten
When some celebrations are approaching and the seasons change, for parents whose children go to preschool educational institutions, it’s time to make children's handicrafts. Many ever-busy dads dislike such tasks, but moms treat this issue differently - they are happy to help their children, because they understand that such exercises allow them to train the brain and develop fine motor skills of the child’s fingers.
Dog
A trinket in the shape of a dog face made of felt will turn out to be a wonderful thing, which is not only distinguished by its beauty and originality, but will also be able to serve for a long time, because we all wear our keys in one bundle. To invent such an accessory will be easy.
What is needed: to have suitable templates for cutting, felt of different colors (felt), suitable for the color of the thread, silicone glue-sealant, beads for the eyes.

Now you should start collecting the dog's face. Cut out the elements, then glue them. In order for certain parts to stand out better, you can at least make stitches with threads - this will be more effective.
At the end you need to fix the eyes and nose with the help of a loop made of a small ribbon that will fix the carabiner or ring for the key fob.

The muzzles can be made both flat (that is, taking one layer of felt) and bulk (using two elements, stitching them together and filling the space inside).
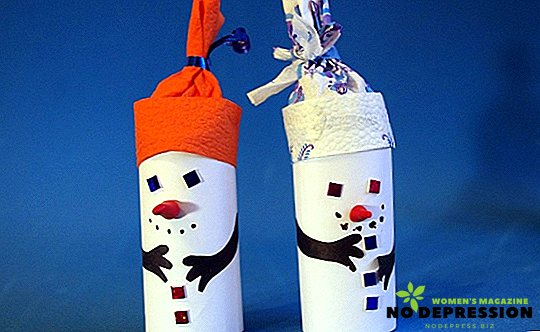
Snowman
To make a snowman from pompons, you will need cardboard paper, scissors, white knitting threads, paper for appliqués, and PVA glue.
The first step is to make three pom-poms. It is necessary to cut several different-sized circles from cardboard paper (two to one pom-pom). Then you need to make a hole in the center. Put together two circles and wrap threads to a decent volume. Then, around the edges of the circles, you need to cut the threads and tie them up with a thread between the circles. Remove cardboard mugs - pompom ready.

The moment came when it was necessary to combine the pompons made by the PVA. Now cut out the paper for appliques of the eyes and nose, attach them with glue.

You can tie a snowman scarf, made of tape or fabric. To make a hat, you can take a thimble, a suitable cap, or use a blank for this purpose.
Dough snowman
Another interesting piece in the form of a snowman can be made from dough. This not only develops the imagination, but also imparts certain skills for baking in the future.

To make such a snowman, toothpicks and a garlic press can help you:
- So, first you need to knead the dough, divide it into two parts, and then paint one of the parts blue using food coloring.
- Now you should make two flat cakes of different sizes - it will be the head and the body.
- It is necessary to immediately work over the face of a snowman, identify the features - eyes, eyebrows, mouth and nose.
- Now you need to fashion your arms and legs and attach to your body.
- Then sculpt a triangle - this is a cap, on it using a toothpick to put a picture.
- Make a scarf out of a strip of dough and make a pattern on it with a toothpick. At the ends you can put a notch - get a scarf with a fringe.
Buttons are made of small balls of blue dough. Now it's time to do a broom. Fasten a toothpick in one hand of a snowman. Taking a small lump of text, pass it through a garlic press. The output will be thin strips that you want to wrap a small strip of white dough. Fix the broom on a toothpick.

Now you need to dry the snowman. And in order for such an article to keep its appearance as long as possible, it is necessary to cover it with acrylic varnish.
Christmas tree
To make a voluminous Christmas tree, prepare cardboard paper, paper for applications, scissors, glue, adhesive tape, decorations.
- So, first you need to bend a piece of cardboard paper in half and cut.
- Then put the resulting halves together and bend them in the middle.
- Draw, starting from the fold, half of the Christmas tree.
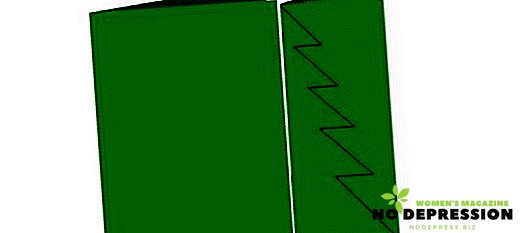
- Cut the workpiece. Get two Christmas trees.
- Now you need to bend both Christmas trees in half.
- To make an incision in the center on one blank from the top, on the other - from the bottom, you do not need to go to the middle.
- Connect the elements.
- To get a lush Christmas tree, take a larger number of sheets of cardboard paper.


In conclusion, it remains to decorate the Christmas tree. Here you can give vent to fantasy - stick cut balls from paper for applications, use raindrops, attach an asterisk.
To decorate a Christmas tree, you may need beads, foil, paint and other suitable materials that are found at home.

For a clearer fixation, you should make a small cut in the blank and "fasten" a star on the Christmas tree. Scotch tape to fasten the connection elements.
Cones candlestick
Another original craft is a cones candlestick.

What you need to prepare: paints, cones, disk, cardboard paper, candles, glue. You can also choose some decorations such as tinsel or beads.
- First of all, you should take the glue and smear the disc with it, then "plant" cones on it in a circle.
- Paint cones, choosing for each specific color scheme.
- Then the crafts can be decorated.
A candle is installed in the center. If you have only one bump - it doesn't matter, the candlestick can be made in this case too. The disc is glued to the top of the bump, which is pre-cut for convenience. If there is no disc, use something that comes handy, such as a cover. Only then it is necessary to make the craft sustainable.
Useful tips
For the invention of handicrafts to kindergarten, things that are completely diverse in nature and origin can be suitable. This and acorns with chestnuts, and cones, often used paper for applications, clay. You can also tinker with more non-trivial materials: cotton pads and sticks, plastic food kits, clothespins and pasta.
Parents of very small “designers” and “designers” can be advised: so that you don’t have to run around with your relatives and friends for a day or two before handing over the crafts to kindergarten, first of all, take the time that nature gives us.
For example, by visiting the seashore in the summer, from there you can grab a few shells and small pebbles. Or, walking through the autumn park, ask the child to collect acorns and different colors of leaves.
If you have a private plot, you can sow dry flowers on it or plant some decorative pumpkins - all this brings the winter perfectly well, being kept in an apartment or house, and at some point can serve as an excellent material for all sorts of handicrafts in a kindergarten.
Photo ideas