Manicure is very simple. The main thing you need to have is patience and time. It is not necessary to spend large sums on expensive masters, because a simple and neat manicure can be done independently. And useful tips and ideas for him can be found everywhere!
Required materials and tools
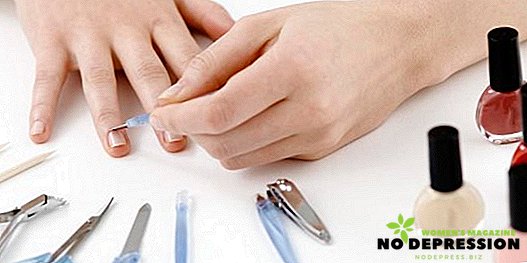
The beauty of home manicure is that it does not require a lot of equipment and expensive tools. Of course, for complex building or coating gel varnish you will still have to purchase the appropriate materials and tools, but for a simple manicure you only need:
- capacity;
- nail files: iron - for filing and plastic - for grinding;
- cuticle stick;
- tweezers;
- towel or paper napkin;

- sharp nail clippers;
- alcohol or hydrogen peroxide;
- vitamin cuticle oil;
- cream;
- dots or toothpick;
- nail polish remover;
- cotton swabs;
- varnish

All these materials and tools are in every woman at home, and if not, then purchasing them will not be a problem. Depending on the chosen manicure, additional materials may also be required: scotch tape, rhinestones, stripes for French or moon manicure.
You can also not be limited to one color of lacquer, but choose several contrast ones to create a bright manicure.
Preparation of hands and nails
Manicure is not just beautiful nails, it’s primarily well-groomed hands. Therefore, it is very important to pay due attention to the hands. Therefore, before a manicure, you must:
- Remove the remnants of the old varnish with a cotton pad dipped in a special liquid;
- Wash your hands well and steam them;
- Soak up excess liquid from your hands with a towel;
- Apply a special hand scrub;
- Gently massage the skin and rinse off the scrub;
- Apply moisturizing hand cream or oil.
The skin of the hands after such a procedure will be soft and gentle, and the cuticle will evaporate well and it will be easier to remove it. After preparing the hands, you can begin to adjust the tips of the nails and apply the coating.

Basic, the easiest manicure at home
A simple and fast manicure, which will not attract too much attention to hands, but will look neat and elegant, is easy to make even at home:
- Pour warm water into a deep container and add a drop of liquid hand soap;
- If you want to add elements of the SPA procedure to the standard procedure, then instead of liquid soap, you can pour sea salt into the water, drop a few drops of fragrant oil or lemon juice;
- Put your hands in the water and keep them there until your skin has evaporated and softened. It usually takes 5-10 minutes;
- Lightly blot hands with a soft towel or tissue;
- Using a special spatula (it can be metal and wooden) push the cuticle on each nail back and slightly raise it;
- Using fine sharp scissors or tweezers, carefully cut the cuticle;
- If the skin around the nail plate is too coarse, it can also be carefully cut with forceps;
- Using a nail file, nail your desired shape;
- It is worth remembering that a nail file can only work in one direction. Otherwise, the structure of the nail deteriorates, and it often breaks;
- When the formation of the form is completed, it is necessary to soften the skin around with a special oil, and then walk on the nail plate with a cotton swab dipped in acetone to remove all the fat;
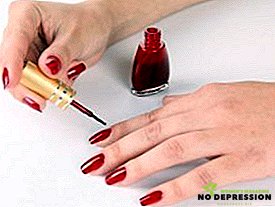
- Apply varnish, and then fixer.

It should be remembered that the skin around the nail is very delicate and must be cut off carefully so as not to injure the finger. If, nevertheless, it was not possible to avoid blood, then it is worthwhile to apply a cotton wool dipped in hydrogen peroxide to the wound so that there is no inflammation.
Also, many manicurists recommend to wipe tools and hands with alcohol or a disinfectant, it will help get rid of bacteria and, as a result, unpleasant consequences.
Very easy manicure with a step by step pattern.
The nail plate is a canvas for the artist. On it you can depict anything, just to have enough imagination and skill. Even girls who make their own manicure for the first time can portray a simple but gentle polka dot pattern on them. It will require:
- pearlescent base varnish;
- dots or ordinary toothpick;
- three contrasting colors of lacquer.

The process of this manicure is very simple:
- Remove the cuticle and give the nails the same shape;
- Degrease the surface;
- Apply 2-3 thin layers of pearl lacquer. You can use plain white or matte varnishes;
- Pour on a sheet of paper three contrasting varnish;
- Toothpick or dots apply on the basis of several points in a row with each color;
- Dry the varnish;
- Cover with fixer.
Ideas for a light and beautiful manicure at home
Today you can find so many ideas for manicure drawings that even if you change them every day, then these ideas will be enough for a lifetime. But there are more popular creative manicures, which will now be presented.
Mustache manicure
It will require clear and black lacquers, a fixer and a dots (toothpick).
Manicure is done in 6 steps:
- The nail is processed and prepared for coating;
- Transparent varnish is applied in several layers;
- Black varnish puts two points at the base of the future mustache, and then two small points like borders;
- A toothpick holds two lines from the base to the borders;
- Corrects the thickness of each mustache;
- The varnish is dried and applied fixer.

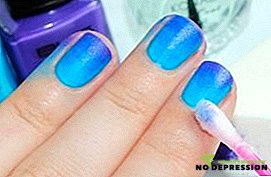
"Color chaos"
This option is suitable for very creative ladies. In addition to white lacquer and several colored ones, you will need scotch and one drink tube, which should be cut into three pieces.
- Nails are covered with 2 thin layers of white lacquer;
- The base is dried;
- Scotch tape must be wound to the fingertips so that the nails are left uncovered;
- Pour three different colored varnishes on a sheet of paper;
- Dip each piece of tube in a separate color of lacquer, place it above the nails and blow it strongly into it;
- Repeat two more times with other colors;
- Dry and apply fixer.
Most likely for this manicure will require additional cotton wool dipped in acetone. And do it better, where it will be easier to remove spray varnish.

"Classic" with adhesive tapes
This manicure is more discreet and is suitable for important events or evening date. It uses only one color of varnish and special thin adhesive tapes, which can be bought in the department with other manicure accessories.
- Apply to the treated nails blue varnish with 2-3 thin layers;
- Dry the nails;
- Stick adhesive tapes;
- Tweezers to carefully cut off the excess;
- Cover with fixer nails in 2 layers and dry them.

"Point" manicure
This coverage option is very simple. Beginners can easily cope with it, but it looks very impressive. It will take for him: 4-5 dark lacquers and 1 light, as well as a brush or dots.
- Prepared nails covered with lacquers in 2-3 layers so that each finger has its own color;
- It is better to paint the nails on the second hand as well as on the first one in order to get a mirror image;
- Dry;
- Dotsom with a light varnish put down 2 points in the base of the nail;
- Dry and coat with fixer.

Graphic Manicure
This option will require only 2 contrasting colors and sticky ribbons. And also a little patience.
- Treat the nails and the skin around them;
- Cover each nail with dark blue varnish in 2 layers;
- Dry base;
- For each nail glue on two tapes crosswise so that they form two triangles - small at the base and large to the edge of the plate;
- In bright pink color paint over a large triangle very carefully, so as not to stain the rest of the space;
- Dry the varnish;
- Carefully remove the strips.
Some remove the strips immediately after applying the second color, but for this you need to be very careful. It’s still easier to remove them when the varnish has dried up.

Chess Manicure
This option takes longer than others and requires black and gold shiny varnishes, as well as duct tape.
- The nail is covered with black lacquer, which dries well;
- The plate is glued with adhesive tape so that only one square part remains open;
- The free space is painted with gold lacquer and dried;
- Then the procedure is repeated only now the square is painted near the base;
- The adhesive tape is removed, everything is well dried and covered with a fixer.

How to quickly and easily make a French manicure at home
French manicure is a classic that never gets old. Make it at home is also quite realistic. You will need a clear or beige lacquer, white lacquer and adhesive tapes or a thin brush.

- The nail is covered with a base, and then beige or clear varnish;
- Apply white lacquer in two ways: either gently draw it with a brush, or stick special white stripes or plain thin tape on the entire nail, leaving only the tips, which are painted in white.

- The adhesive tape is then removed and beautiful white tips are obtained;
- White varnish is dried and applied to the entire nail fixer.

Today, French manicure is popular, where instead of white lacquer, bright colors are used: red, green, yellow and even black.
The process remains the same, but the end result pleases with its simplicity and at the same time creativity.
Useful tips
There are many tricks to make the manicure process quick and avoid some trouble:
- To remove bright polishes from the nail (burgundy, red) and not stain the skin around them, it is necessary to grease the hands with a rich cream before this;
- If the skin is still colored, the tape will help remove the stains - you just need to attach the adhesive tape to the skin and remove it;
- To remove varnish with sequins or sparkles, each nail must be wrapped with cotton wool with acetone and wrapped in foil for 5-10 minutes;
- The manicure will last longer if the nail is pre-degreased, and after applying the lacquer to apply a fixative;
- It is best to apply varnish in several thin layers;
- Matte color can be obtained if you support the nails covered with ordinary varnish over the steam;
- To remove the varnish that has fallen on the skin, it is necessary to moisten a thin makeup brush in acetone and gently erase the strokes with it;
- Instead of special strips for French manicure, you can use regular tape.

Using these little tricks, you can not only simplify the process of manicure, but also approach it creatively. And you should not spare any time for this, because well-groomed hands and nails are the first things that men pay attention to!
Another simple manicure idea is in the next video.