The tie as a male accessory familiar to us appeared at the very end of the 19th century. Prior to that, he was known as a silk or cambric neck scarf, tied in different ways depending on fashion. Literally translated from German as "scarf".
Types of tie knots with tying schemes
At various times, various types of fabrics for this accessory and methods of tying were popular. Now we know more than eight dozen different nodes. Men prefer to use simple options. More attention is paid to the color and fabric that is used.
Plain
A simple node is known for a long time. Originally it was called "Oriental" or "Kent." Because of all the known knots, he was distinguished by the convenience of tying, he was called simple. And this name stuck with him so far. For beginners, this method is optimally suited.
There is another name by which this node is known: Four-In-Hand. Really tying it is easy, and it looks very elegant. This method is suitable for tying wide and medium accessories.
 So let's get started:
- Raise the collar of the shirt.
- Be sure to fasten the top button.
- Put on a necktie tie, lower the ends loosely down.
- Lower the wide end approximately 30 cm below the narrow end.
- Look at the diagram and make a wide end around the narrow end as shown in the picture.
- Push two fingers into the loop and hold it.
- A wide part of the drag up and then immediately pass through the resulting loop.
- Tighten, forming a familiar knot. And then pull up, holding the narrow end.
Now we need to look at the result. Place the accessory strictly in the middle. Its length should be approximately to the waist.
In order that the narrow end does not look out, it is necessary to place it in a loop (loop), which is now necessarily done.
Windsor
Now it is not known whether the Duke of Windsor really tied a scarf in such a way and the fashion for such knots went from him. In any case, they say so. You can definitely say that fashion began in the time of Edward VII. Prior to this, they wore rather curvaceous neck accessories made of light fabric.
At the end of the 19th century, men, in contrast to the previous fashion, began to tie symmetrical knots on dense fabric. It is possible that the famous Duke wore this. "Windsor" is a flat knot with a rigid base.
 The algorithm for tying the Windsor node is as follows:
- Raise the collar of a shirt and put on a tie, putting the ends down.
- The wide part of the tie is on the right shoulder, and the narrow part is on the left.
- To form a cross from two ends: the wide side is on top.
- Thread the wide end across the crosshair and pull it up and then down.
- Then pull it right down.
- Wrap around the tie and pull the wide end to the left.
- Then wrap again, as shown in the figure, but pull out to the right.
- Form a "pad" from right to left.
- Thread the wide end down and slightly tighten while adjusting the knot so that it lies flat.
This is one of the easy and spectacular sites, we advise you to use it for everyday and holiday options.
Double
There are several nodes that are suitable for special occasions. They are formed by double wrapping one end around the other. These are so-called double knots, they look quite magnificent. Sometimes they are used to make a thin or soft enough tie look more impressive.
 There are several types of such nodes. "Victoria" is a classic way of tying a tie with a double knot. So:
- We put on a tie, narrow part on the left shoulder, wide - on the right.
- We lower the ends down, move the ends so that the wide one goes down almost to the knees, and the narrow one is at the level of the chest.
- We cross them, wide turns out to be narrow.
- Wrap two times from right to left around the narrow part, forming a "pad".
- We skip the wide part upwards and into the resulting loop.
- Tightening tie and straighten it.
This knot is suitable for the old, slightly worn and out of shape tie.
Knot for a narrow tie
A narrow tie is not for everyone. In the 60s, when he was in trend, everyone wore him: fat and thin, tall and short men. Now, when the main reference point was not fashion, but measure and taste, men try to choose ties not only in color, but also in shape.
 Narrow ties are suitable for tall, thin men.
For a thin tie, the following knots will do: Poluvindzor and Quarter:
- Raise the collar and put on a tie, the wide part on the right shoulder.
- We release it from the bottom up.
- Making a knot, holding the loop from the inside with two fingers.
- We get a wide part on top and tighten the tie.
Poluvindzor suitable for narrow ties. On its wide asymmetry is more visible.
Beautiful knots for a tie
Pratt
It was coined by an employee of the American Chamber of Commerce, so the second name of this site - "American". Jerry Pratt invented this knot as universal. It is suitable for special occasions and everyday wear. Many people liked the way of tying inside out.

Eldridge
The knot looks very extravagant, reminding weaving "pigtail". The most difficult thing is to remember the sequence of 15 steps. But he is worth it! He came up with just recently, a little over 10 years ago.

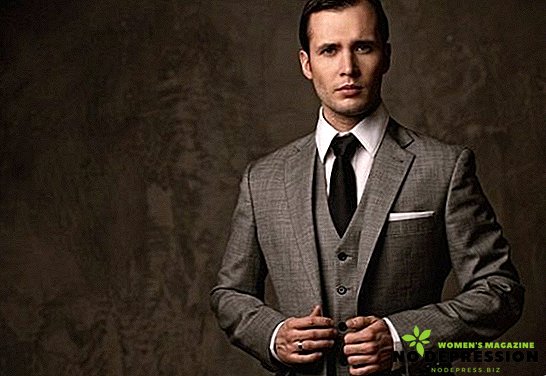
Basic rules for choosing and wearing a tie
There are several rules by which your tie will look your best:
- Width. It should be selected taking into account the constitution of the man and the details of the jacket. If the lapels are wide, then you need to choose a tie. A large man will suit a wide accessory. Low - medium, high - narrow. Thin men should not wear wide ties. Much better will look narrow and medium.
- Colour. It should be selected depending on the appearance of the wearer, the color of the suit and the importance of the event. It is believed that the shirt should be a tone lighter than the tie, and the jacket is just as dark. Choosing a tie in the store should be in front of a mirror. No need to tie him, enough to bring to the face. Any accessory must be in harmony with the rest of the clothes, whether it is casual or festive. The solemnity of the moment can be emphasized by the presence of a pattern or ornament.
- Length. The tie goes down to the belt or 2-3 cm below. In no case higher and not much lower.
- The visible part of the tie. This is the part that is visible from under the jacket. There are certain rules by which a man will look more attractive in a tie. If a man's upper torso is much larger than the lower: broad shoulders, then he needs to leave a small part of the accessory for show. It should peek out a knot and 10-15 centimeters of the tie ribbon itself.
Modern designers advise to have several ties in the wardrobe. Basic set:
- plain tie;
- striped;
- polka-dotted or speckled (it can be a casual version in dark colors with light specks);
- bright, for celebrations.
Do not forget that the number and color will depend on the social status of its owner and profession. For example, people of creative professions need more bright colors than the manager.
Rules that relate to the methods of tying knots and wearing a tie are not needed by themselves. Only thanks to them can a man look more attractive than usual. Many people think that they look "somehow wrong" and decide not to wear accessories at all, believing that they don’t go.
But this is not true, ties go all. But you need not only to choose the right color and shape, but also to tie and wear it correctly. This is the only way to overcome the psychological barrier and freely wear this accessory as a sign of belonging to a social group of respectable and confident men.