Testoplasty is a new fascinating kind of needlework, which involves the creation of a wide variety of pictures from salt dough. If earlier this kind of needlework was intended to develop fine motor skills in children, today it is a full-fledged art form. Adult needleworkers create whole pictures from this material.
Why is dough made so popular? There are several reasons for this:
- It's not expensive. If any other handicraft, be it embroidery, knitting or drawing, requires the purchase of high-quality tools and materials, then only hand-made flour and salt is needed for this handicraft;
- It does not require special skills. It is not necessary to finish the art history department or the school of sculpture in order to create masterpieces;
- It develops. Sculpting contributes to the development of thinking, fantasy, the ability to make a composition;
- It improves spatial thinking. With the help of modeling you can learn how to convey shapes, proportions and colors.
Sculpting dough has long been popular. The history of this handicraft is rooted deep in history. Even with the advent of the first flour (about 6000 years ago), people began to sculpt various figures from the finished dough, and later they became the first wards, along with herbs and stones.
Very often, people received an equilibrium price in gold for an artfully crafted amulet or figure.
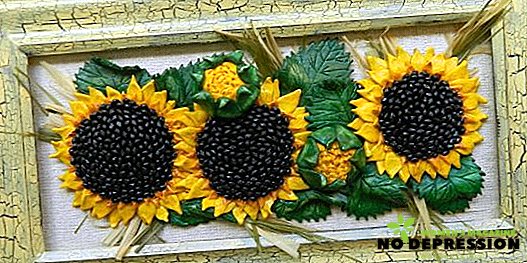
Today, such paintings are very popular among craftswomen and needlewomen. Usually they consist of a canvas (sheet of cardboard, canvas, etc.) on which various paintings are molded. They are not flat, but volumetric due to the texture of the material. Products are painted with paints or varnished to later decorate interiors. Testoplasty is a full-fledged art form that you should definitely try to do!

Recipe for salt dough for painting
Preparing salt dough for sculpting is very simple. All that is needed is:
- flour - 0.2 kg;
- salt - 0.2 kg;
- water - 125 ml;
- vegetable oil - 1 tbsp. l
If you need to get a multi-colored product at once, then you need to add a dye that dissolves in water to this recipe.

There are two ways to knead. Both are good and are chosen according to personal preferences:
- Salt is mixed with flour until homogeneous (if desired flooded with a blender), and then water is gradually added to this mixture. The dye is soluble in water;
- Salt and dye dissolve in water, and then flour is gradually introduced into it.
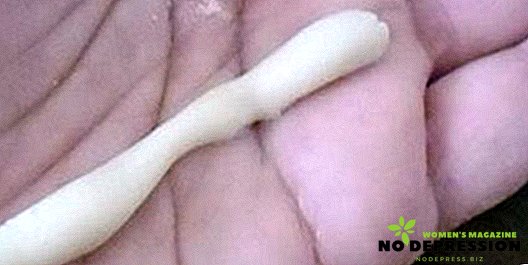
Knead the resulting mass must be tough. First, the dough must be brought to a state in which it will not stick to the hands, and then beat on a wooden or iron surface. If it begins to crumble, it means you need to add water, and if it sticks to your hands, it means flour. After mixing, it is very desirable to keep the finished material in the package in the refrigerator for 1-2 hours. And after that you can start sculpting.
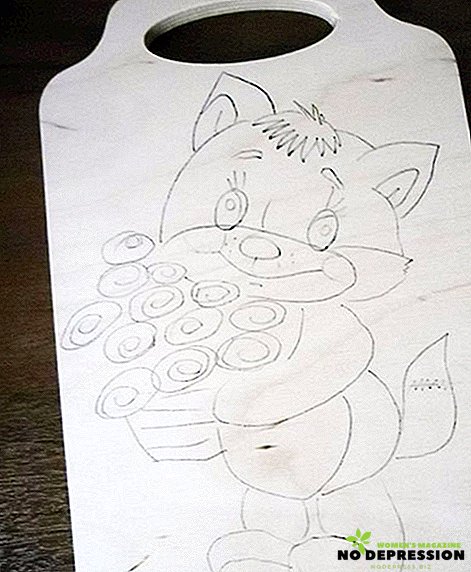
Simple painting "Kitty" from salt dough with your own hands
This work is done on a wooden background or on a cutting board. Transferring the picture is not required, so the work is done on the basis of the sketch.
It will take:
- background or board;
- watercolor and gouache paints;
- paint brushes;
- salty dough;
- PVA glue";
- colorless varnish;
- knife;
- varnish
Master class with step by step photos:
- A drawing is drawn on the board;
- Preparing salty dough: 2 cups of flour mixed with 1 cup of fine non-iodized salt and 1 tbsp. spoon of vegetable oil. All this is filled with 1 glass of water. As soon as the dough is kneaded, put it in the fridge in the bag for an hour;
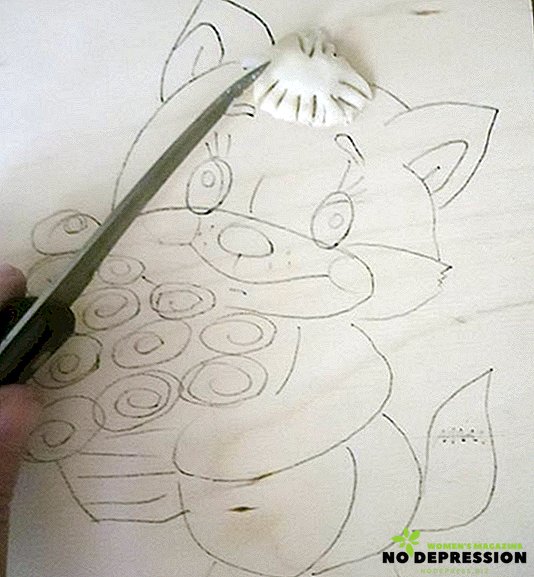
- The picture will be sculpted with voluminous elements (nose, ears, eyes, tail, paws, cheeks and a basket of flowers). The first is a fringe. A piece of dough kneads in the hands and bangs out of it;
- Place under the dough should be greased with glue. So it will be better to hold. Glue will not be noticeable after drying. To form irregularities, the dough must be cut with a knife;
- Other parts are molded in the same way;

- Roses for flowers are molded from "sausages". They roll in a circle and lightly pressed against the background. It turns rose bud;
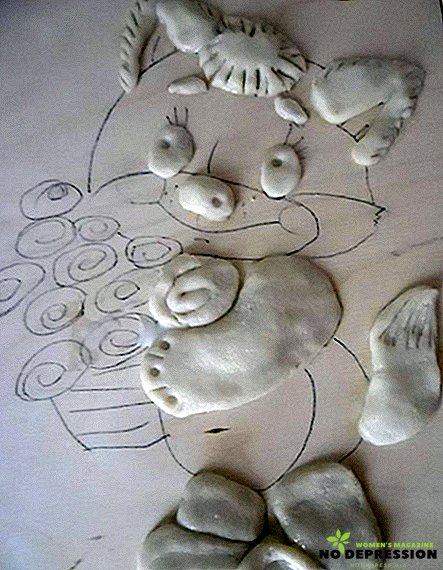
- A basket is formed from individual strips. Cuts are made with a knife to make the basket bulky;

- With this all the voluminous parts of the picture are ready;
- Put the board in a dry place for 3 days and allow the dough to dry completely;
- After drying it is necessary to paint the picture with bright colors. If desired, you can use gold paint to give greater beauty to the colors;
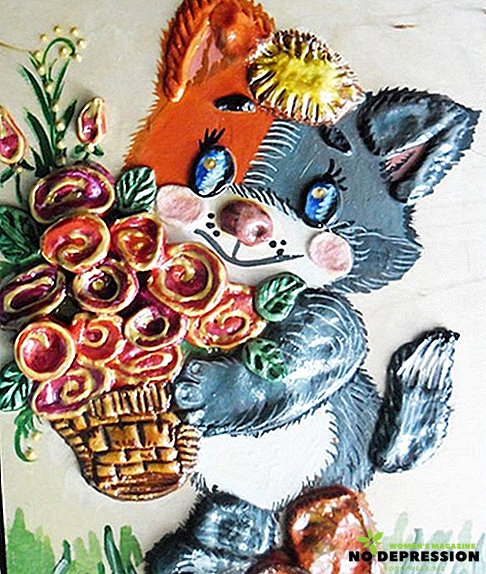
- To preserve the product it is necessary to varnish. So the picture will not crumble or fall apart over time.


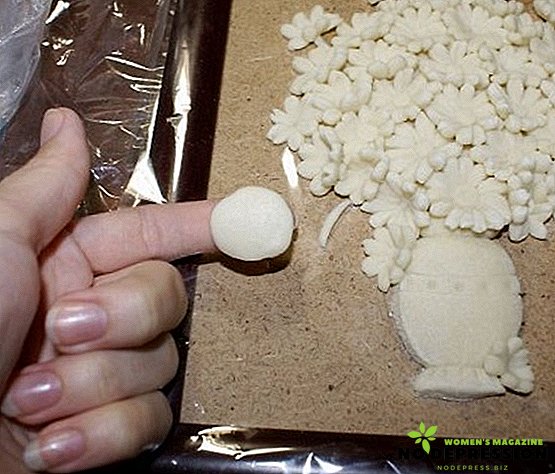
How to make a picture of flowers from salt dough
"Daisies in a Vase" is the name of this picture, and it is made quite simply.
It will take:
- food film or cellophane;
- salty dough;
- cardboard sheet or wooden plank for the background;
- matter (optional) for the background;
- toothpick;
- tassel;
- knife;
- nail scissors;
- water.
Process step by step with the photo:
- Salted dough is prepared according to the standard recipe and is divided into three parts: one is bigger for flowers, the second for flowers and the third for vases. Food film or cellophane spreads on the wooden background;
- A vase is formed from a piece of dough. She can be any what the needlewoman wants. Here it is formed from 3 parts: a base is made of a large piece (it is unrolled and formed into a vase), two smaller pieces have a stand and a handle;
- With the help of a knife made a drawing on a vase;
- Next, flowers are made;
- From the second part, an oval is rolled out and is located above the vase - flowers will be attached to it;
- A small piece of dough rolls into a slightly flat ball;
- With manicure scissors, it is cut into petals;
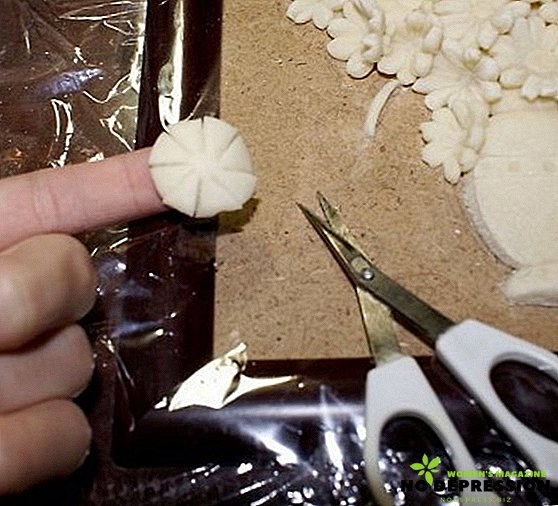
- Then, using the thumb and index finger, the “square” petal is slightly compressed and shaped. These actions must be repeated with each tab;

- The result is volumetric petals;

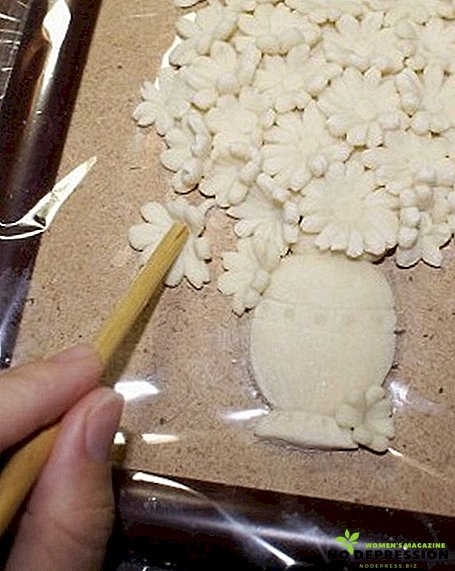
- With the help of toothpicks are made veins on the petals;

- The place where the flower should be placed is slightly wetted with water and a flower is placed there. It should be slightly pressed down using the back of the brush;
- Roll a ball out of a small piece of dough - this will be the core of the flower;
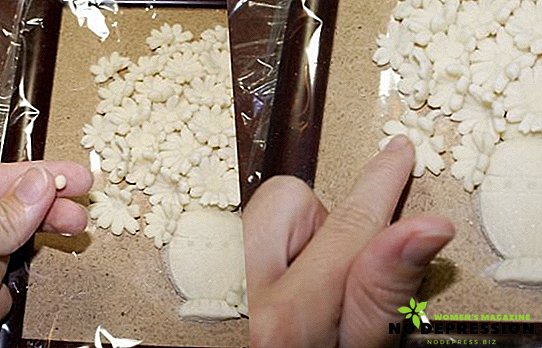
- The core must also be slightly pressed down;
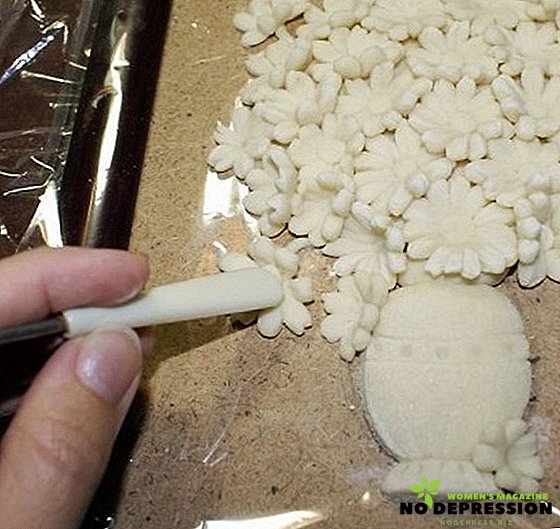
- And slightly beat the petals with the sharp end of the toothpick at the junction with the base so that they join;
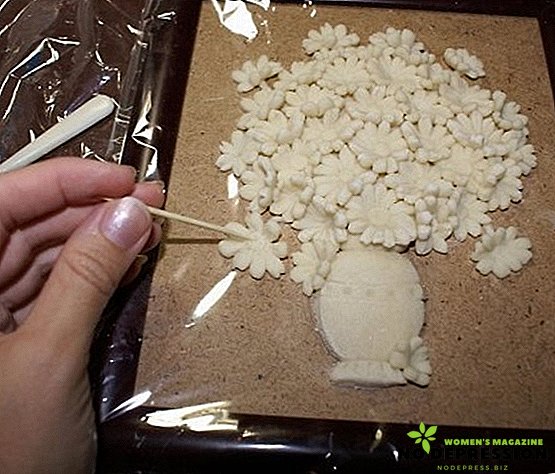
- This procedure is repeated with all the flowers;
- Once the picture is ready, it must be left to air dry until it is completely solidified;
- As soon as the dough dries the picture, turn it down with a dough on a soft surface and carefully peel off the film;
- The background is covered with coarse cloth (burlap, linen cloth) on both sides;
- Spread the back surface of the work (i.e. dough) with glue. It is best to take the "Dragon". And, without lifting the product, attach it to the fabric. Those. the smeared surface itself adheres to the fabric;
- Then the work is painted with paints or varnished at will;
- After drying the paint on the background, you can attach a frame.


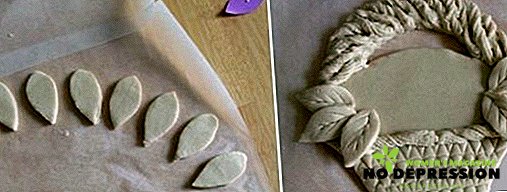
How to make a picture with a basket of salt dough
The picture is made on a large sheet of parchment paper - it is easier to lag after drying, without spoiling the picture itself. You can also use cling film or do the work already on the finished background.
Would need:
- ingredients for the dough or ready-made salty dough;
- parchment paper - 1 sheet;
- sharp knife or stacks;
- garlic press;
- template paper basket and leaves;
- paints and brushes;
- water for wetting;
- Carnation - 3-4 pcs.
Workshop of creating a painting with your own hands:
- First, you need to prepare the dough from 1 cup of flour, 1/2 cup of salt and 2 tsp of citric acid. All this mix in a saucepan, adding 1 tbsp. l of vegetable oil. Heat over medium heat, gradually pouring in water and stirring. It takes about ½ cup of water. As soon as the mass begins to lag behind the pan and form into a lump, remove the pan from the fire. Stir the mass with your hands, adding flour if necessary;
- Roll out the dough layer so that it is not thicker than ½ cm;
- Put a pre-prepared template on the layer and cut the basket with a sharp knife;
- Chunks of dough that have been cut to pass through the press. Twist the strips from the resulting flagella and, pre-moistened with water, attach them to the handle and to the top of the basket;

- Weaving baskets can be done using a knife or stacks (special tools for sculpting);
- Using a pattern (or cookie cutters / pasok molds) cut the leaves and attach them to the basket;
- Of the big pieces of dough roll balls - it will be apples, grapes and plums. In the apples stick a carnation to give credibility;
- Attach the fruit to the basket, also moistening the joints with water;
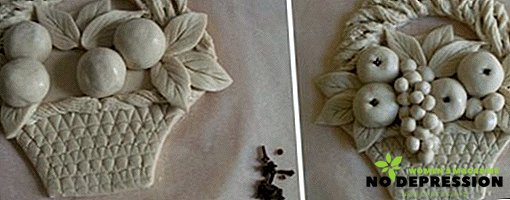
- Once all the parts are attached - leave the picture to dry in a dry place. Do not dry in the oven - so the picture can quickly fall apart;
- To dry the basket will be 2-3 days, and after that you can decorate with paints at your discretion;
- It is easy to transfer a picture from paper to the background - just turn the dough down onto a soft surface and gently detach the paper. Grease with high-quality glue (it is desirable to take high-quality and special) back surface of the dough and glue to the background.


Useful tips
A few tips for needlewomen:
- It is best to use top grade flour;
- Salt take only fine grinding (extra) without iodine;
- Oil can be any vegetable: olive, sunflower, canola or flaxseed. But if it is necessary to add essential oil, then it should go in the same amount as the vegetable oil;
- If the product is supposed to be large, then glue or paste should be added to the dough for stickiness;
- The dough can be kneaded using a blender or mixer.

Cooking from salt dough is fascinating. It is possible to attract children of all ages to this activity and this will become not only entertainment, but also useful!
Another guide to making flowers from salt dough is in the following video.