Even before the appearance of the baby, many mothers begin to think about the dowry and try themselves in knitting. Of course, booties, socks, envelopes and other things can be purchased in the store, but every woman wants unique things for her child - manually connected by her mother, in the process of making which each loop was made with love and special warmth.
Rules for choosing yarn and materials for decoration
The skin of a small child is different from an adult - it is very delicate, easily damaged, irritated. Among other things, the baby has not so well developed natural protection, and this means that the dyes used in the manufacture of yarn, can cause an allergic reaction in the child.
That is why manufacturers offer a special line of baby yarn, which is not so dangerous for an infant.
When choosing a base material for knitting, you should pay attention to hypoallergenicity, naturalness and softness.
Dyes, as already mentioned, are allergens, which is why very saturated colors should be avoided, moreover, such yarn will shed. It is better to choose a product of a proven brand - "Alize", "Pehorka", etc.
As a rule, these manufacturers add acrylic or microfiber to wool in order to achieve softness - everyone knows that natural fiber is unpleasantly pricked. The composition of the yarn can vary, if domestic manufacturers often offer wool mixture (Merino six in composition reaches 50%), then the thread from the Italian company can contain only 20% of synthetic fiber (for example, Lana Baby Merinos brand).
If there are any doubts whether it will be pleasant for the child to wear the product from the material intended for the purchase, you can perform a simple test: it is enough to hold a skein on the lips and think about your feelings.

Synthetic and cotton threads are also popular. The first, produced by the latest technology, do not "creak" and, despite the lower price, look enough. In addition, this material perfectly keeps the heat, and also absorbs sweat and products of the sebaceous glands.
Buttons and other decorations should be chosen large and bright so that the child could not swallow them if they come off. Recently, "stickers" are popular - stickers on clothes, as well as sticky embroidery, but such decorations are not kept in the best way on wool.
How to knit envelope for newborns
Size: 0-6 months.

It will take:
- 250 grams of gray yarn;
- 250 g dark gray;
- Knitting needles number 6;
- big needle;
- buttons.
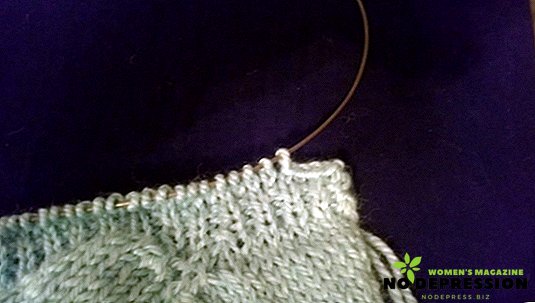
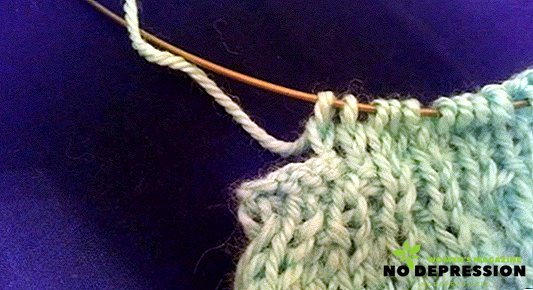
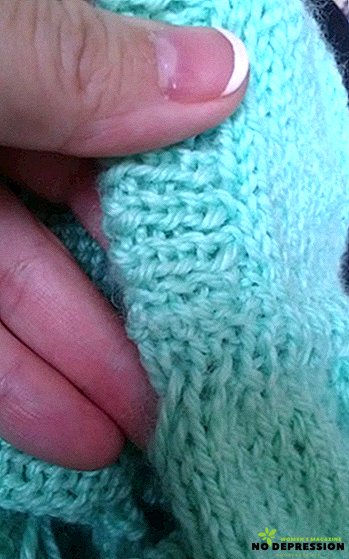
Instructions from the photo:
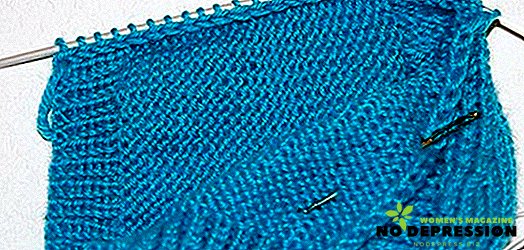
- Gather 90 loops, knit 55 cm with the front satin strap (8 rows of one yarn, 8 with the other, with cutting threads);
- In the 56 row close 45 loops, 45 leave;
- Knit the rest - 20 cm tall;
- Close;
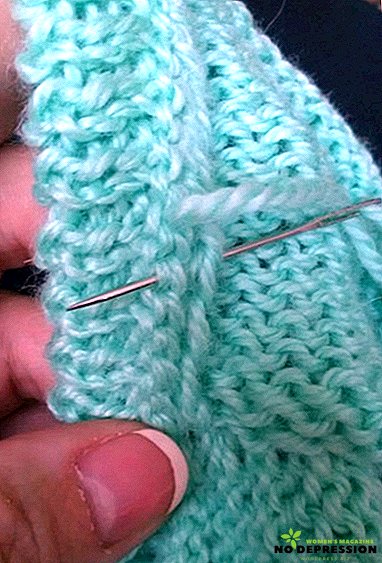
- Sew loops according to the scheme:
- Collect the envelope.

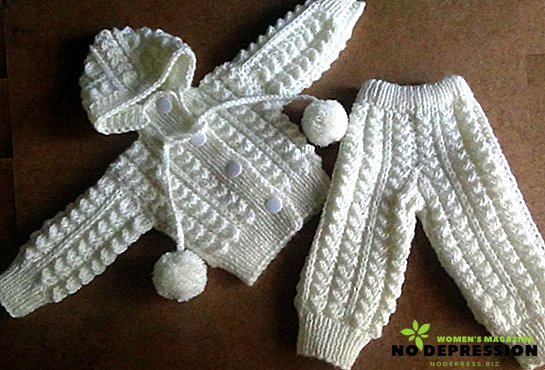
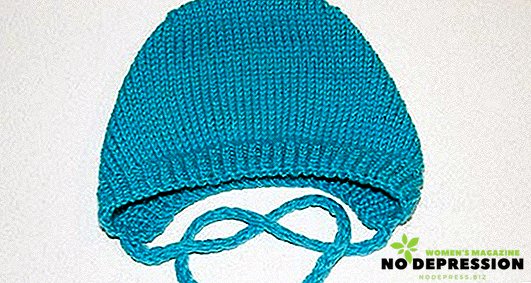
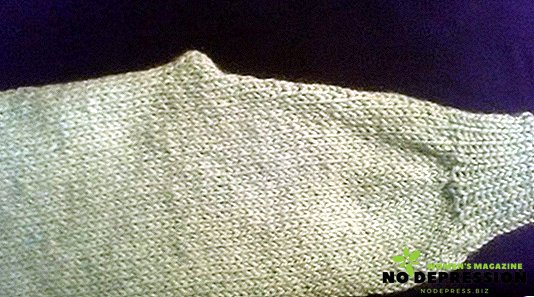
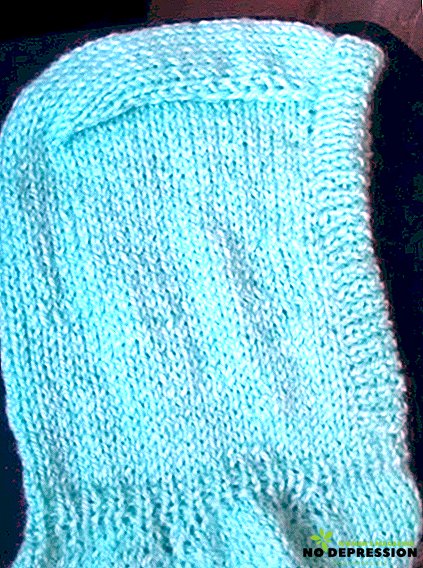
Knitting hats for newborns with knitting needles: schemes with step-by-step description and photos
Cap with patterns
Size: 3-6 months (40-44 cm).

It will take:
- half-wool yarn - about 100 g (200-250 m);
- boucle yarn - 50 g;
- stocking needles No. 3;
- Knitting needles number 6;
- hook for refueling residual tails;
- lace.
Knitting description:
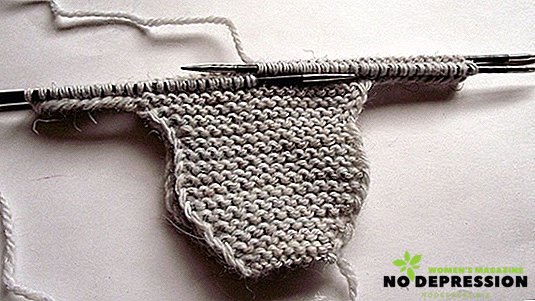
- Type on the spokes number 6 ten loops, the extreme side - edge.
- Two rows to perform the usual garter stitch, in the third add one loop on each side.
- We continue tying, adding one loop in each third row until the total number of loops reaches 16. Run 22 rows without increments.
- From the 23rd row add one loop at the beginning, performing the front row. Knit in this way until the total number of loops reaches 22.
- Tie the second ear caps.
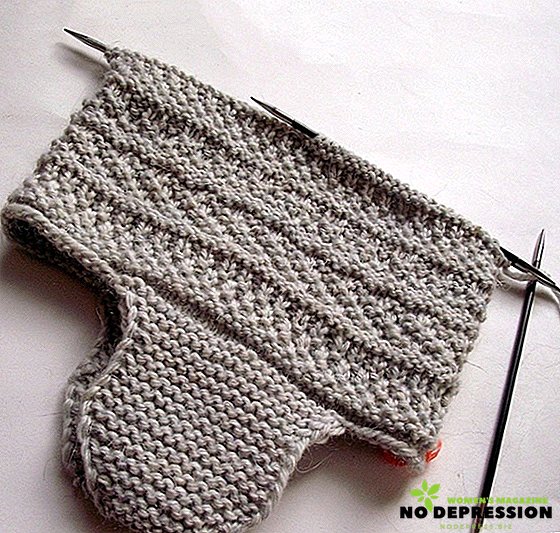
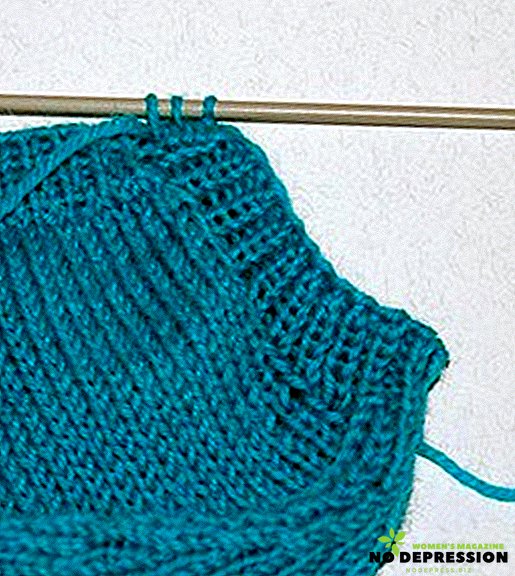
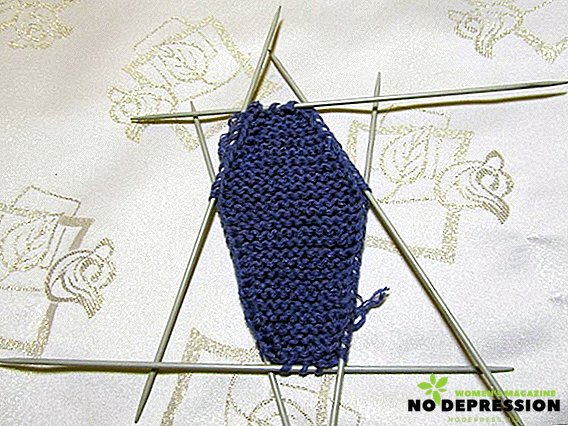
- Start circular knitting with the transition to stocking knitting needles. First we knit the loops of one ear, then collect 20 loops for the back of the cap, knit the second ear, dial 24 loops for the front again and close the knitting. Count loops - it should make 88 loops.

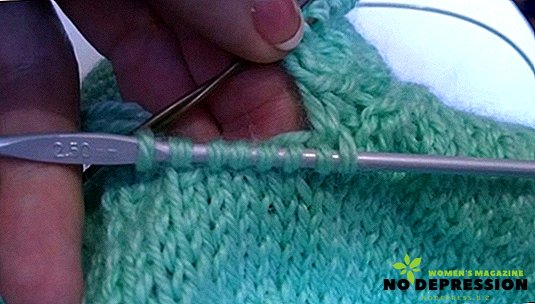
- After joining, continue knitting, choosing a pattern to your liking. The figure suggests a pattern of a combination of facial and purl loops and a pearl pattern. In order to perform a pearl pattern, it is necessary to knit two rows like a rubber band (1 * 1), and then two more rows with an elastic band, making an indent (so that instead of facial ones there are purses and vice versa).
- Tie 10-12 cm, then go to the front surface and begin to subtract - three times in every third row, reduce knitting by 6 loops.
- Go down to each row by 6 loops, so that there are only 10 left at the end. Hide everything.
- Cut the working thread, leaving 10 cm, stretch it through the last 10 loops and pull off the crown.
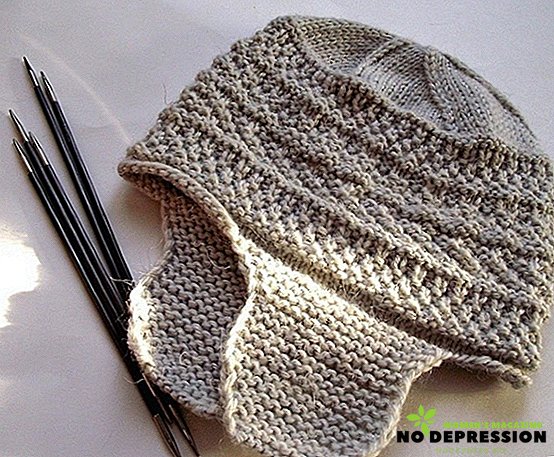


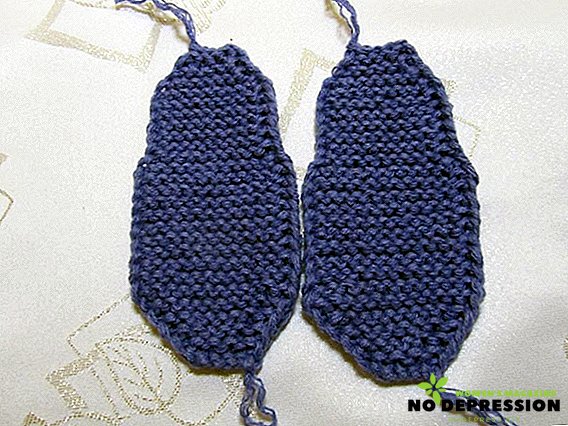
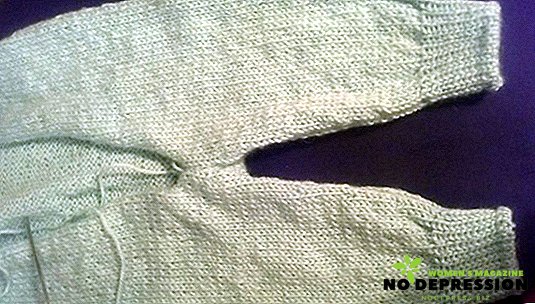
Fur ears lining:
- Dial 4 loops. Knit to perform the front loops crosswise (one by one).
- In the 3rd and 5th rows add two loops on each side.
- 6,7,8th ranks to perform without changes.
- In the 9th subtract 4 loops - 2 on each side.
- Make another 2 rows, close the "ear".
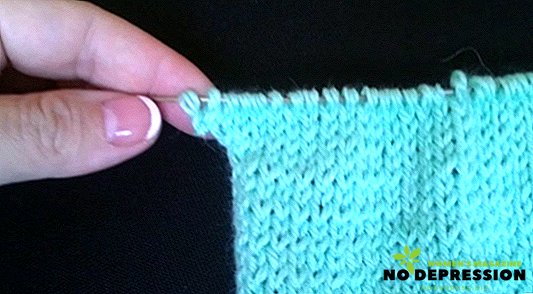
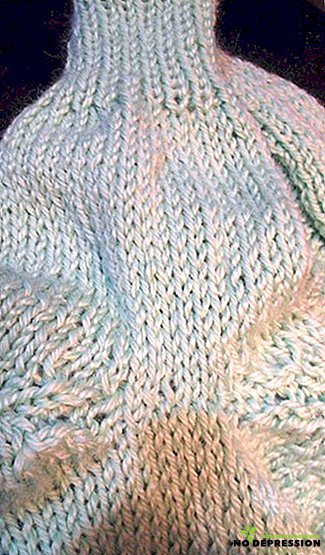
- Snap the resulting circles to the workpiece as shown in the very first figure. Cap ready.
Cap for a newborn
Size: for babies up to 3 months.
It will take:
- 50 grams of wool or wool;
- knitting needles number 3, circular
Knitting description:
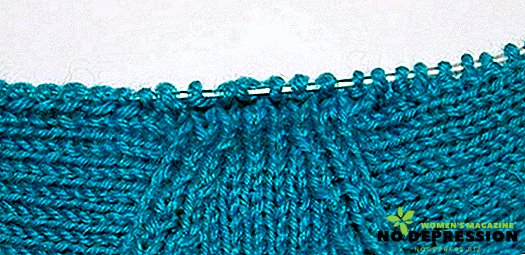
- Dial 60 loops.
- Tie a rubber band (one on one) 2-3 cm, that is, 8-10 rows.
- Run the front surface of the 30-32 row, about 12 cm from the gum.
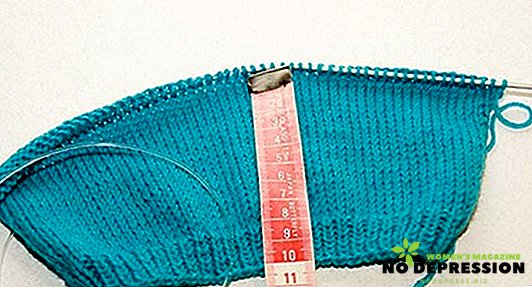
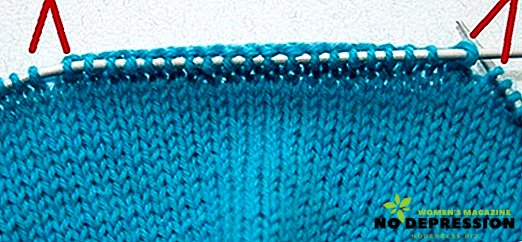
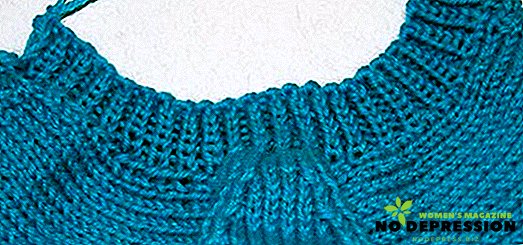
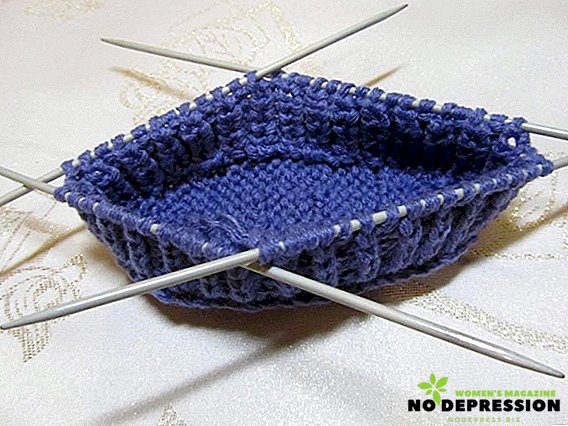
- Divide knitting into three equal parts, 20 loops each for the sides and the occipital zone.
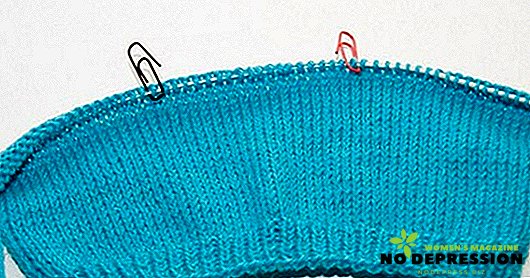
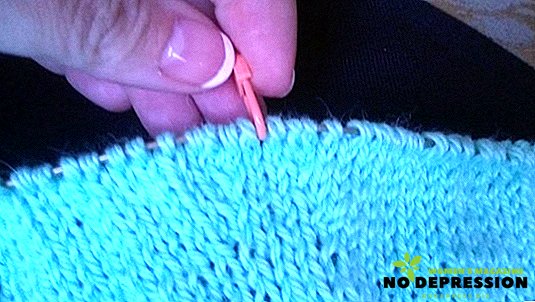
- After the separation, tie the front row to the black clip, ignoring the red one, and knit two loops into one after the clip.
- Next purl row to knit until the red clip, repeat the reception of two loops in one after the clip. Remove the markers.
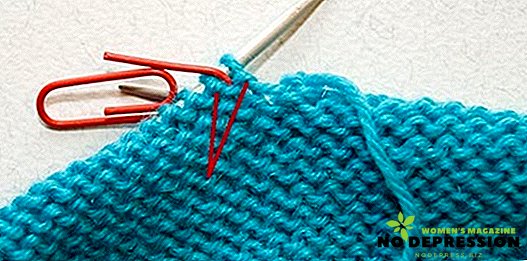
- Thus, in the canvas formed gaps, which are necessary in order to navigate when reducing the loops.
- Continue knitting, gradually diminishing the sides. In the middle part there are always 20 loops. After 12 loops are left on each side, also start to reduce 6 loops evenly in the back of the head.
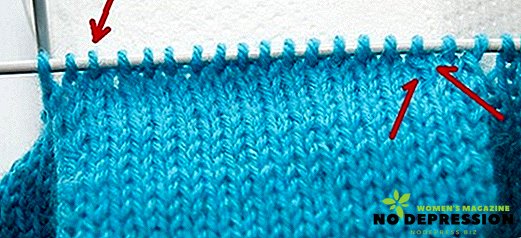
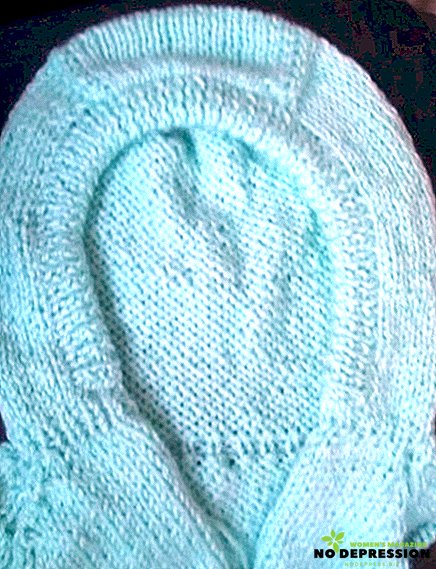
- From the sides there should not be a single loop, and in the middle - 8 pcs. Cap formed.
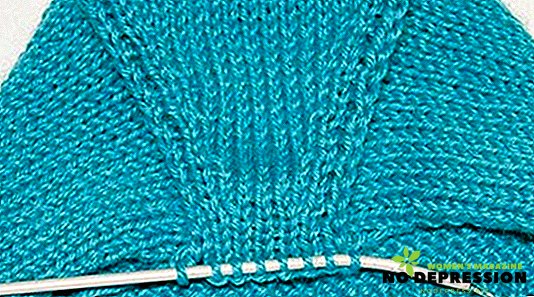
- With the help of a working thread, we make purl loops from the edge loops of the sidewalls.
- Next, we make a drawing with an elastic band, knitting the edge loops of the second sidewall.
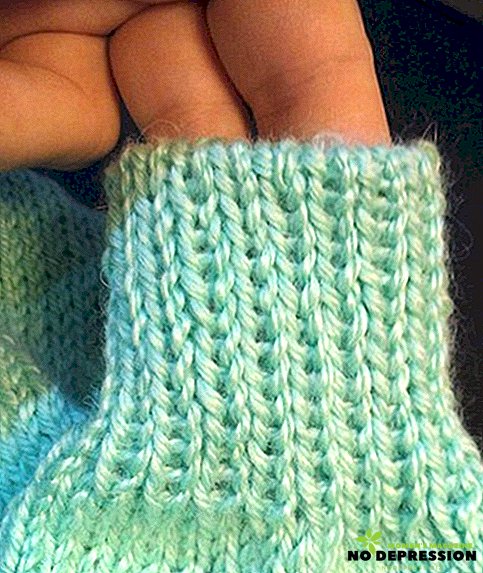
- Knit a rubber band 2.5 cm.
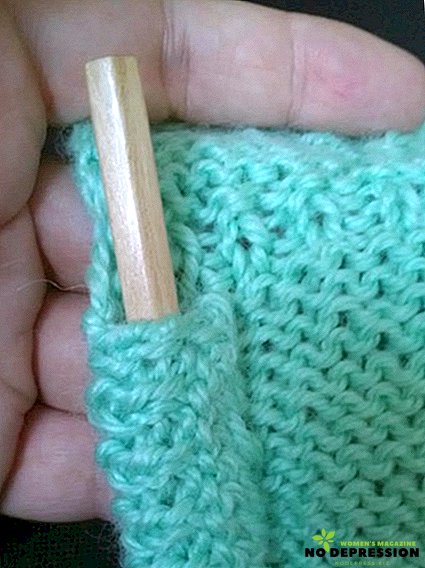
- Leave three loops for knitting strings. Ropes can be made with a front satin, garter stitch, tubule.
- Hide threads, steam cap and pull on a roller or jar.


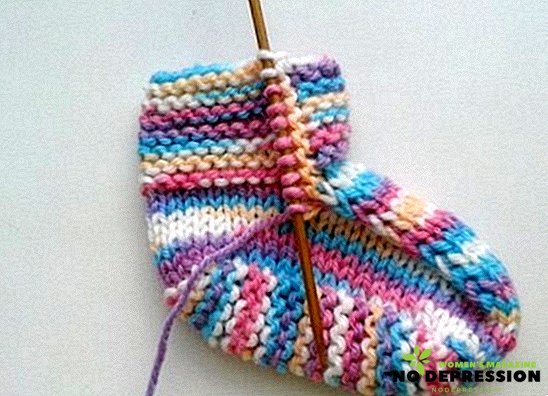
Schemes knitting bootees knitting needles for newborns with step by step description and photos
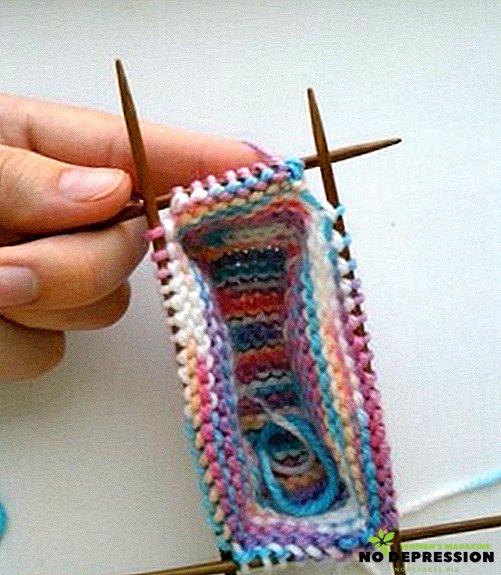
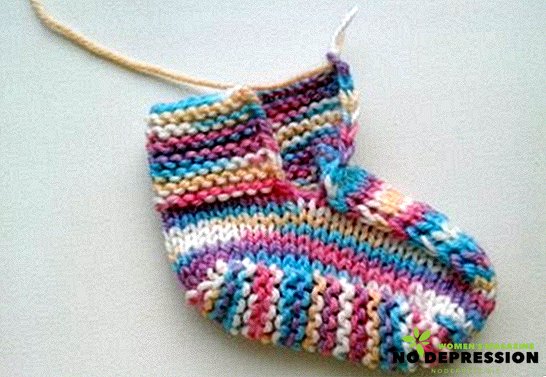
Booties from Bekah.knits
Size: 0-6 months.

It will take:
- wood-colored yarn, wool mixture, wool - 3 skeins 50 g each in different colors, white, blue, gray;
- spokes - № 2,5.
Knitting description:
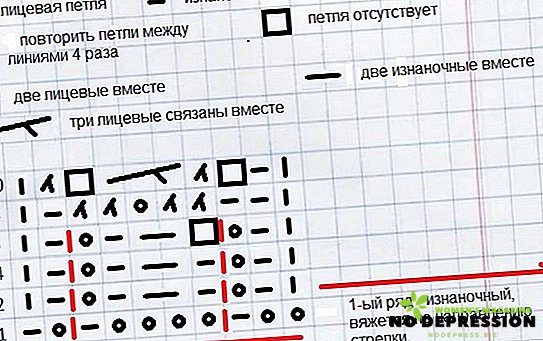
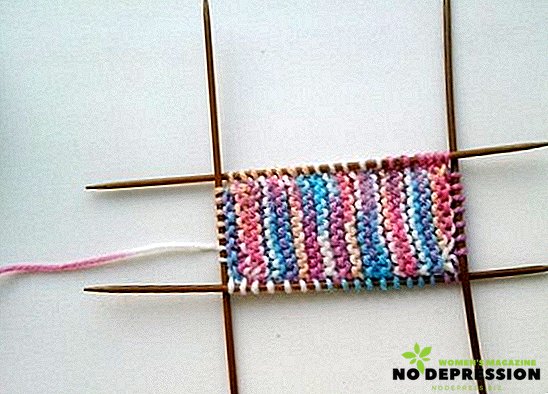
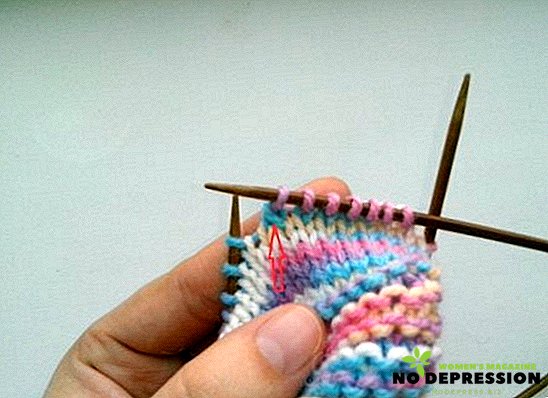
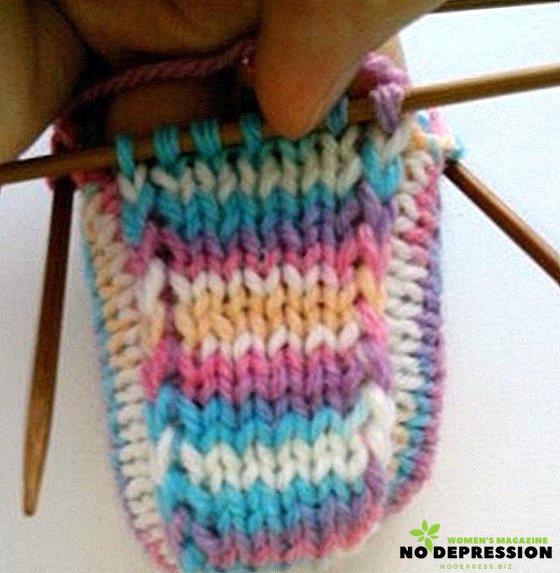
- To perform the garter sole soles (two round-trips = one hem), odd rows — facial. To do this, you need to dial 6 loops, then in each second row add one per queen after and before the edge loops, so to tie 14. On the 31st row do one decrease from each side. Then continue to knit up to the 44th row, from the 45th start to reduce, knitting from each side two in one and so on until there are 6 unlocked loops. Tie the second sole.
- For the toe and heel we collect three loops, on the sides - 25 each (12 and 13). Knit a row satin.
- Next, 3.5 cm to perform English gum.
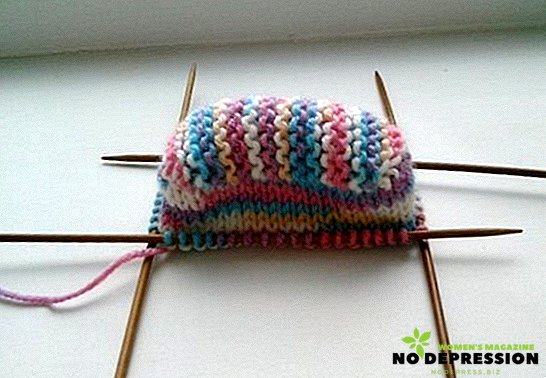
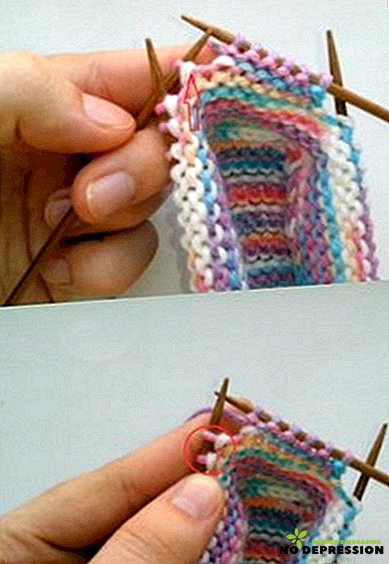
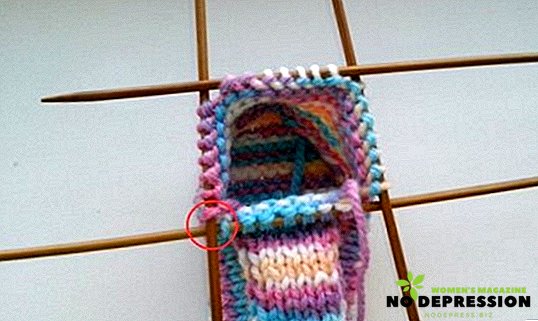
- Redistribute knitting: leave one eyelet on the toe, 12 to the left and to the right of it - on the sides, distribute the rest into two needles.
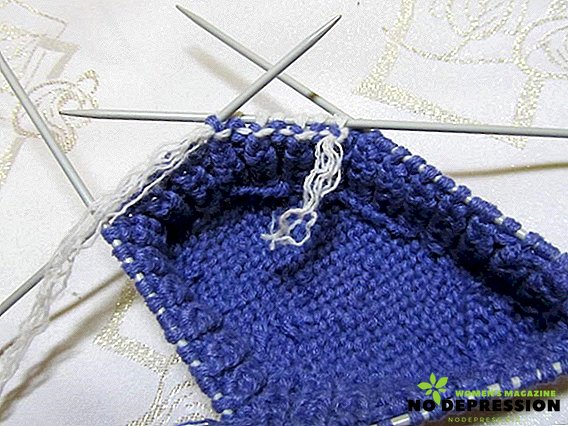
- Execute 4 rows in a circle, on the fifth start a pattern.
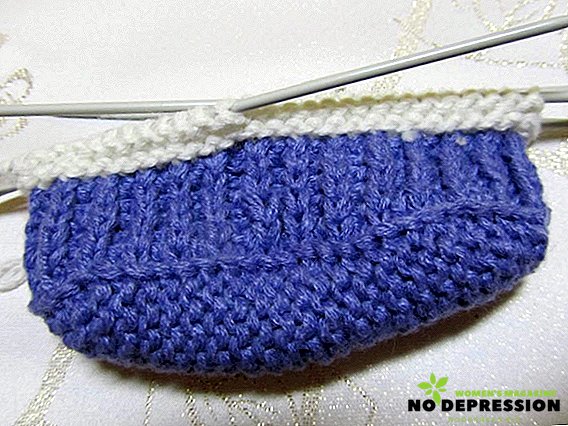
- Proceed to the toe booties. Run the pattern according to the scheme, in the end there will be only 5 loops.
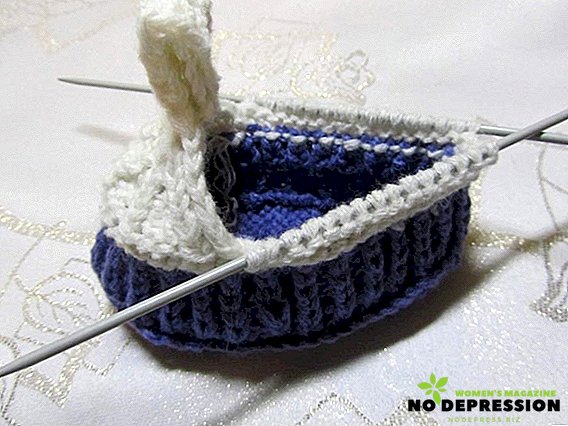
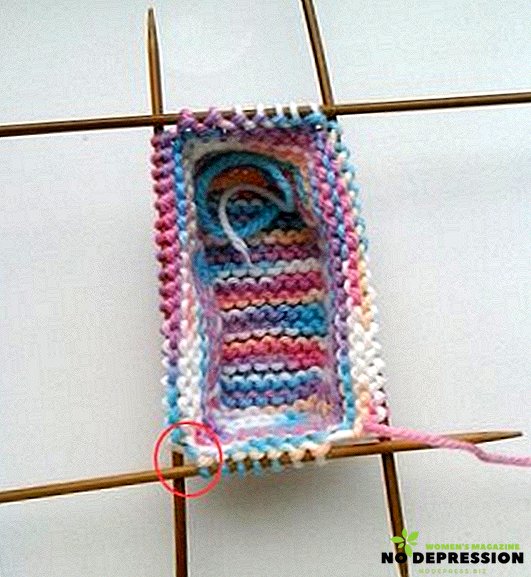
 Knit stitch. Knit 10 scarves shawl linen - it turns strap.
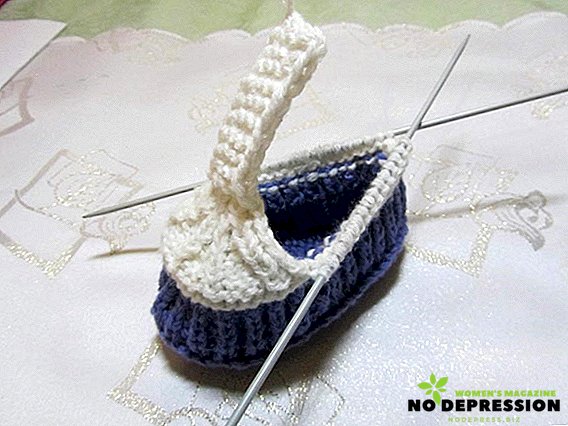
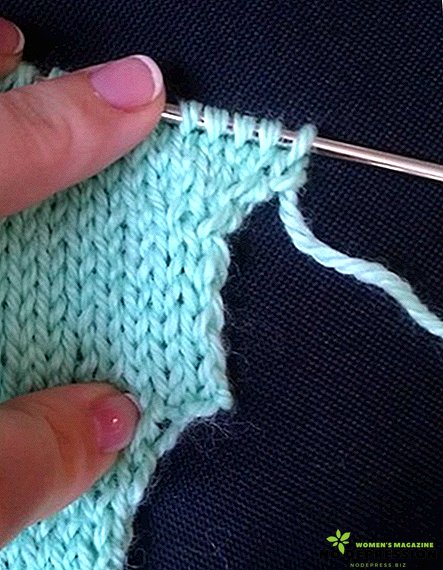
- Sew a strap to make a loop.
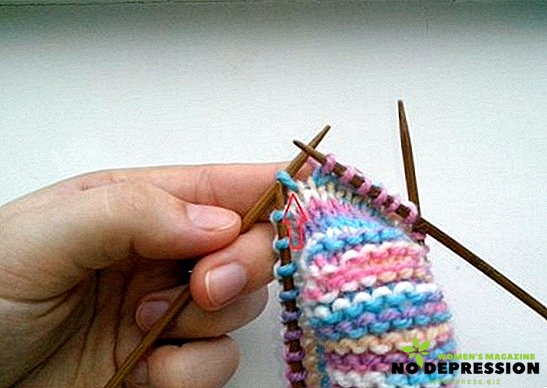
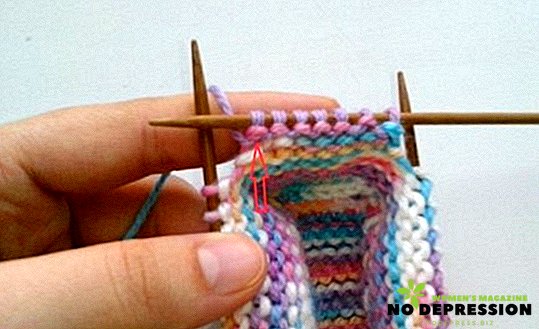
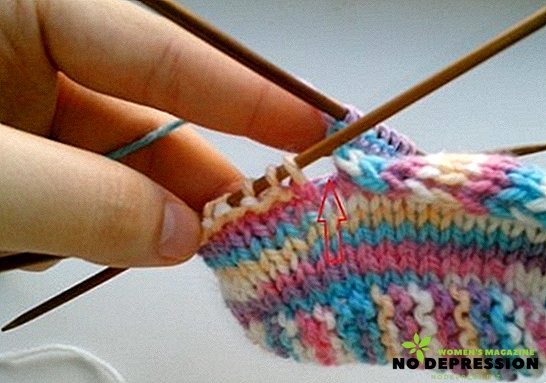
- Proceed to the back of the bootees, tie another thread, tie two ribbons, add 15 loops.
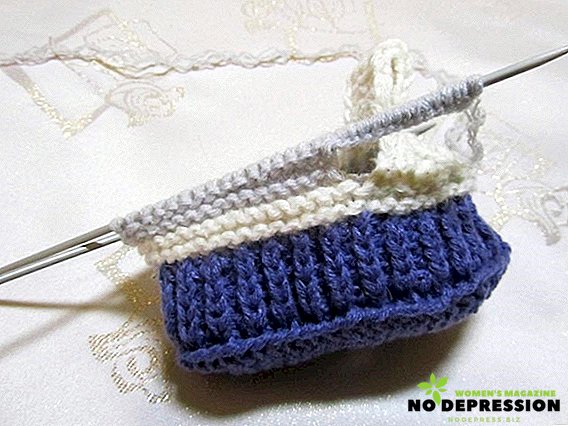
- To knit 2 scarves with a garter stitch, at the end of the strap, make a loop for a button - put a nakid over three loops to the edge and knit two into one. Make the strap the width of the loop.
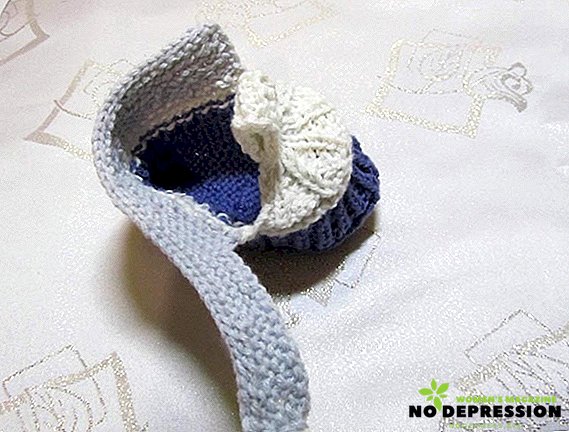
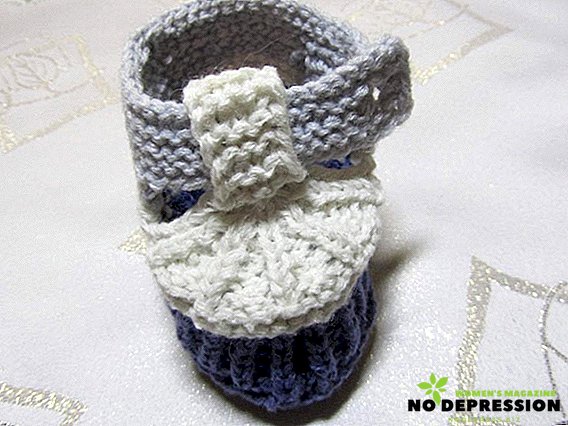
- Embed the strap, sew on a button and add decorations.


 Knit stitch. Knit 10 scarves shawl linen - it turns strap.


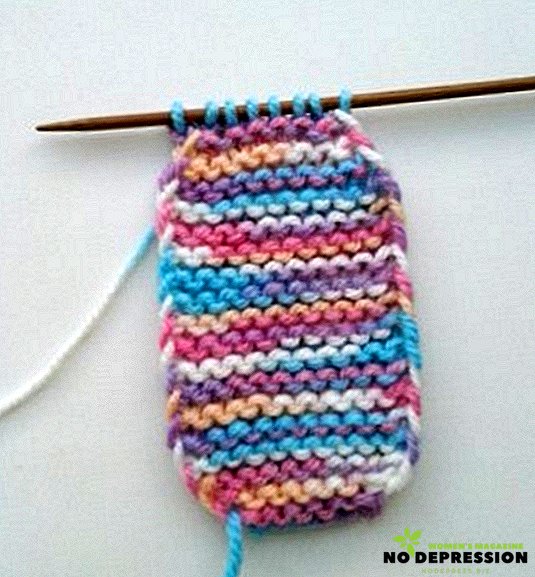
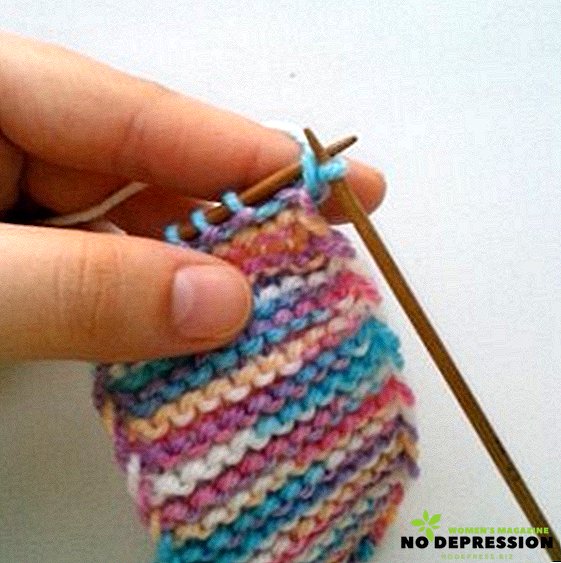
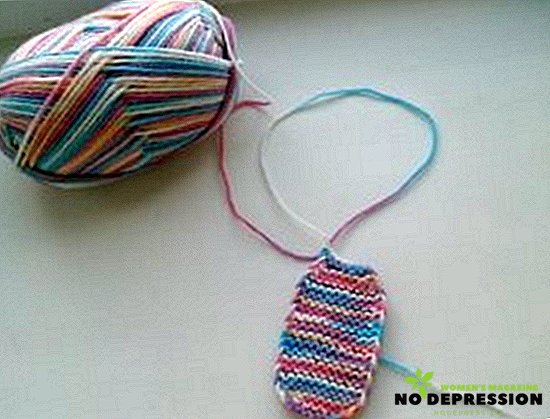
Multicolored booties
Size: 0-6 months.
It will take:
- dyed in different colors yarn, Trinity or Alize;
- needles number 3.
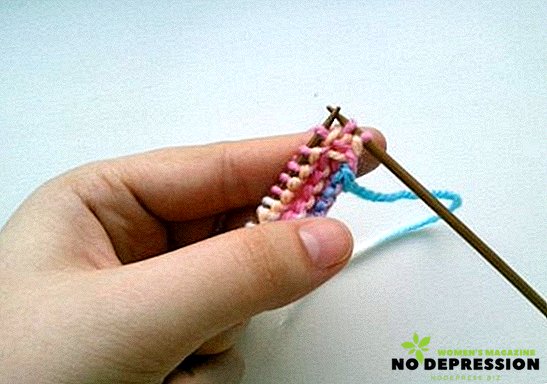
Consider the knitting process.
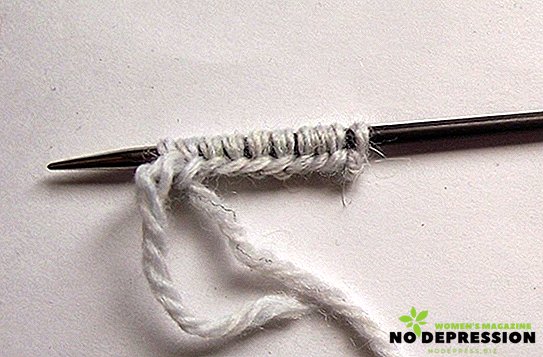
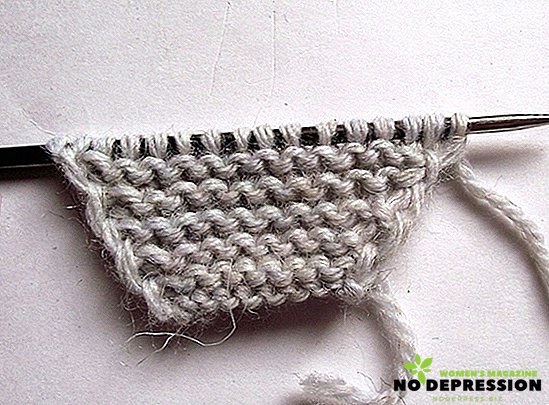
Sole:
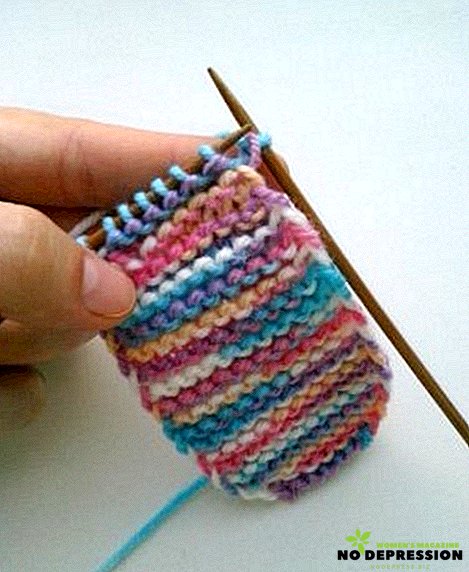
- The main pattern is a garter. Dial 8 loops.
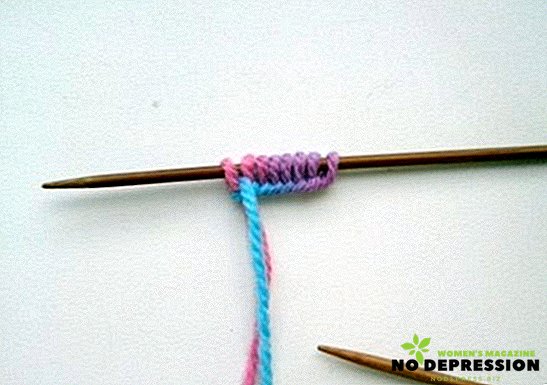
- Start with facial mating
- Make a raise. To do this, in the third row pick up the edge knitting needle.
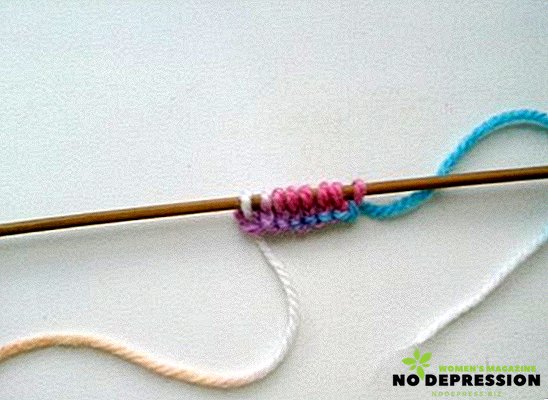
- Make an additional loop: we introduce a needle into the base.
- Stretch the thread, receiving an additional loop.
- Continue by drawing.

- Tie up, leaving two loops. Perform increments according to the scheme in 3 and 5 columns, to make 12.
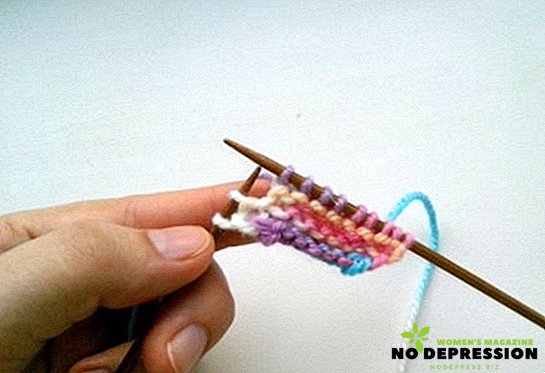
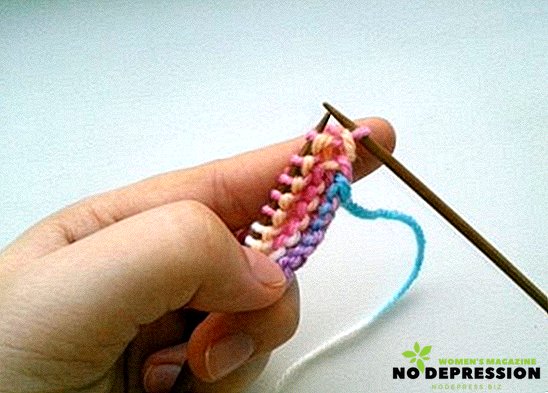
- Just as at the beginning, add a loop at the end of the row.
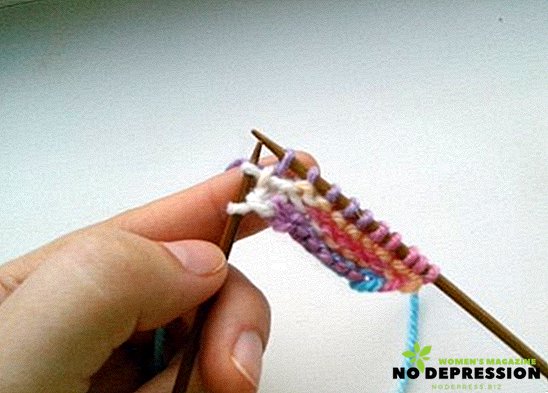
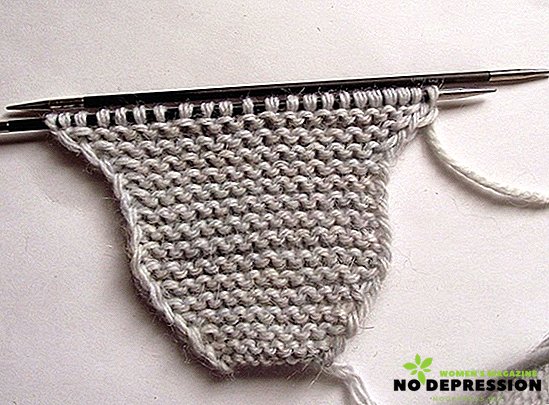
- We knit 32 rows according to the scheme, proceed to the reductions: in the 33rd and 35th, make two loops into one.
- The needle should be 8 loops.
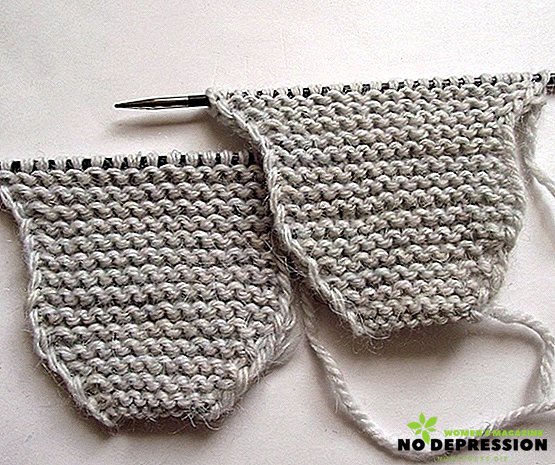
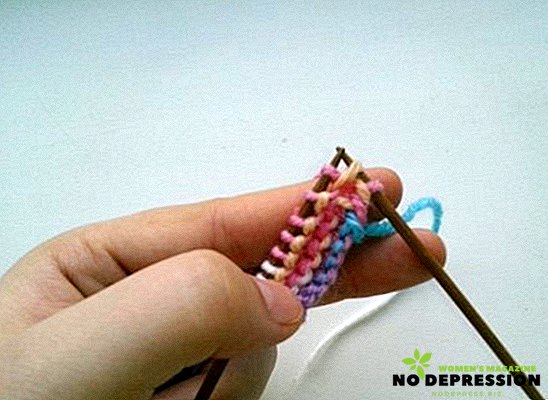
- Close the sole. Remove the edge.
- Tie a loop.
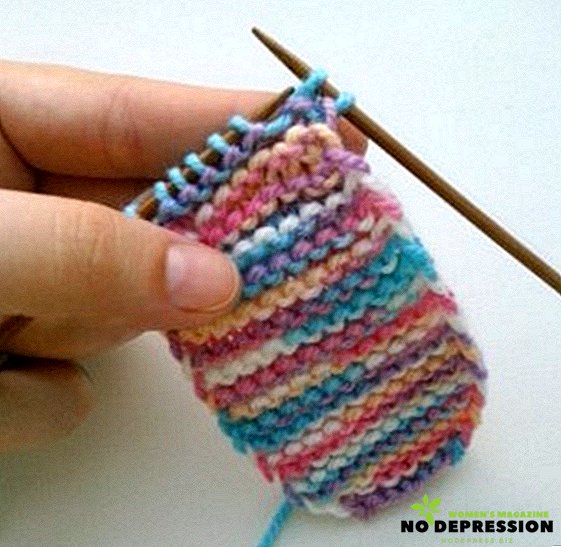
- Enter into the edge left needle.
- Pull one loop to another.
- Complete the harvesting.
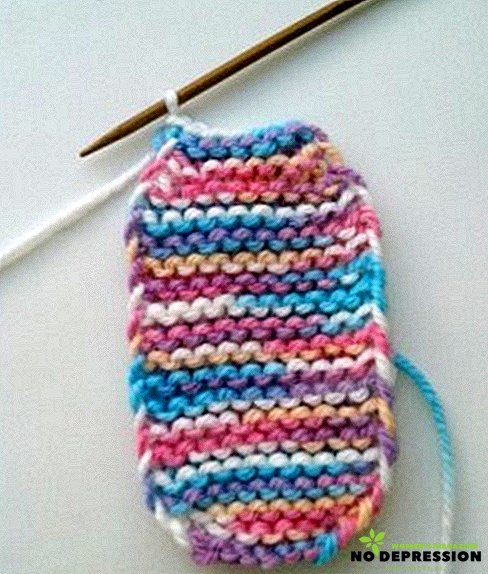
- Tighten the knots, without cutting the thread.


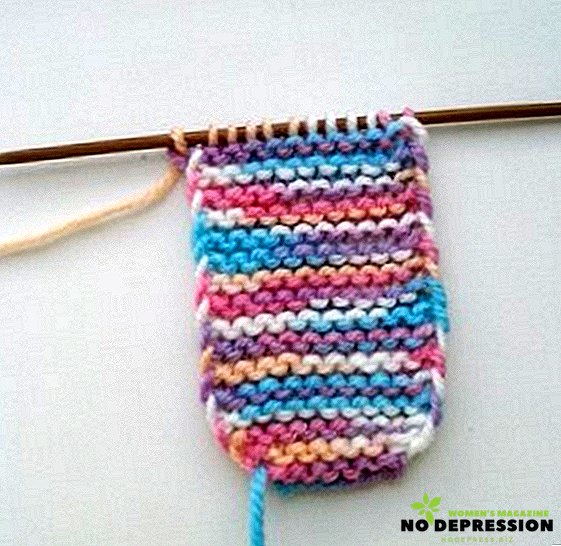
Main part:
- Using a working thread, set 7 loops on the narrow side and 18 on the wide.
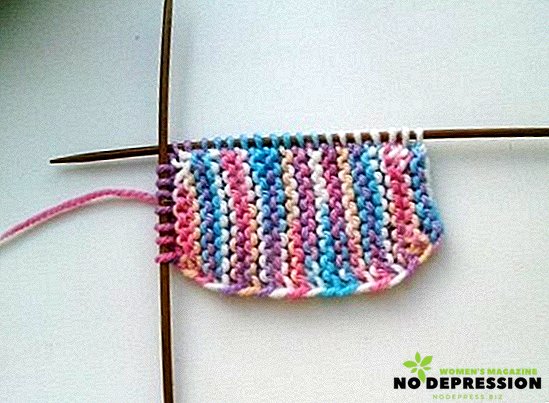
- We make the facial surface 2-2.5 cm.


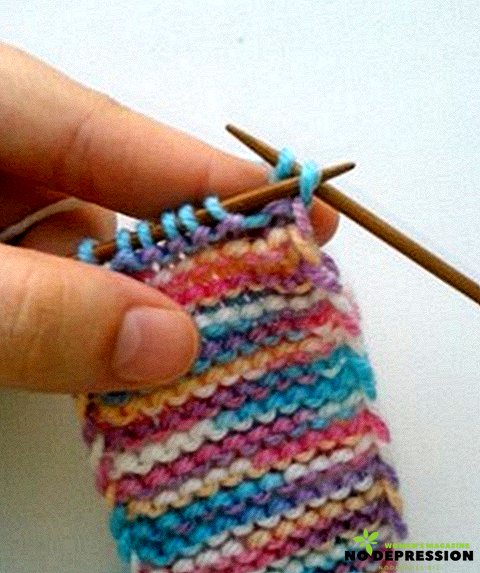
Sock:
- Let's link another column, do not touch the last 7 loops.
- We knit 6 loops, we transfer the 7th to an additional knitting needle.
- It turns out 6 on the right spoke, 19 on the left.

- Tie two loops on the left side of one and leave on the right to get 7 loops again.
- Rotate the product.
- Knit also: remove the edge trim, 5 wiring according to the pattern, 7 - remove to the additional one, and then the neighboring one.
- Repeat the same technique - knit the first two loops in one purl.
- Again, turn the knitting, continue to knit, also transferring the last loop, and then knit the first two so that there are always 7 loops in the middle.
- Knit a sock so that there are 7 loops on each side.
- Knit 14 shawl columns, not connecting in the specified place.
- Close the 14th row, do not cut the thread.
- Make a fastener by making 10 eyelets in the edge. The first and second rows of the fastener should be made with facial ones, the third one - edge band, double cap, two together, front one, double cap, two together, edge band, fourth and fifth - as first and second, seventh - close.
- Cut the thread and tie the ends, sew on buttons and decorations. Knit the second bootie in the same way, but make the clasp on the other side.


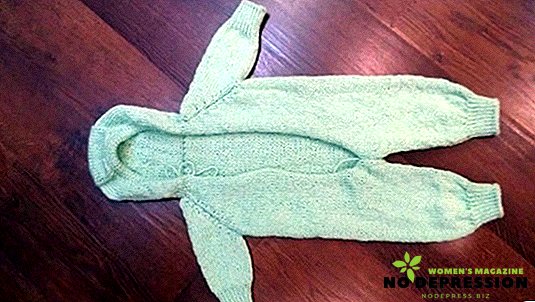
How to tie a beautiful jumpsuit baby
Size: for newborns up to 6 months.
It will take:
- yarn with a wool content of less than 30%, children's acrylic, cotton, viscose - 250 g;
- Knitting needles - circular No. 3, stocking No. 3, for cuffs - No. 2;
- hook for strapping number 2;
- thin lightning.
Knitting scheme with step by step description and photos:
- The number of loops is calculated from the knitting density (1 * 1 cm) and neck girth, that is, by multiplying the number of loops in one square cm by the length of the neck measurement + 2 cm.
- For wool it will be enough to dial 68 loops with a cross set.
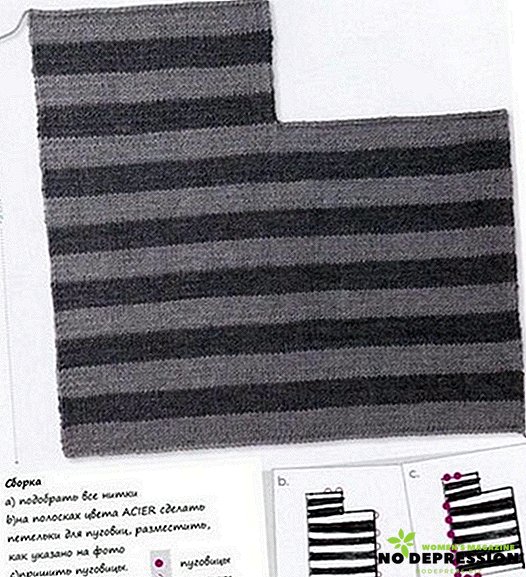
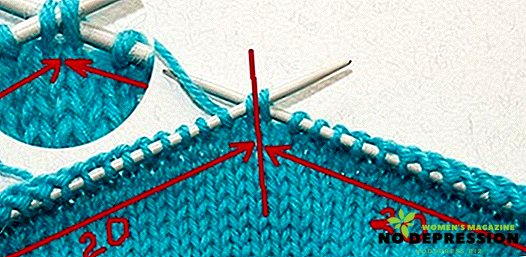
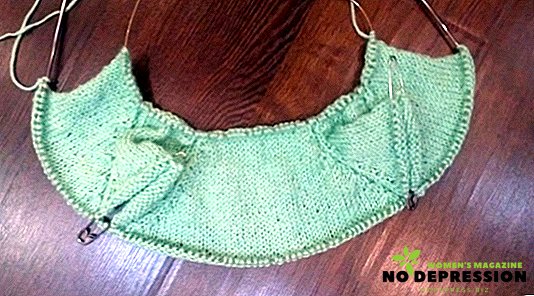
- Getting down to the main canvas. Knit the first row of the purl, then distribute the loops on the raglan according to the scheme: 11 loops per shelf, 9 each - on raglan sleeves, 20 - for the backrest and 8 - for the raglans themselves.

- Reglan stripes are knitted in the wrong side, while the first row - the eyelets are made according to the pattern, but from the inside (11 back, 2 front, etc. according to the scheme). In the first front row it is necessary to knit shortened on the sleeves and the back.
- Make additions, before raglans and after in every second row. Increments are made by tying 3 loops from one (front, nakid, front).
- Thus, each face row adds 8 loops.
- The total length of the raglan is about 13-15 cm, depending on the size and height of the child. The figure shows that 6 increments were made.

- On the shelves turned out 23 loops, on the sleeves - 33 each, on the back - 44, 8 - raglan lines. After the end of the canvas, you need to shift
- Next, the "undercuts" are made, that is, the air loops get between the shelf and the back. That is, after making raglan lines, add 4 air lines, skip sleeves, go to the second raglan line and knit your back, another raglan line, add 4 air lines. There are 106 loops on circular loops. You can knit, not picking up the loop, then the last flap loops go to the next part.
- Knitting continues to stitch without additions.
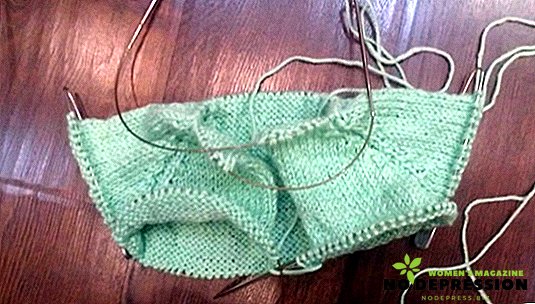
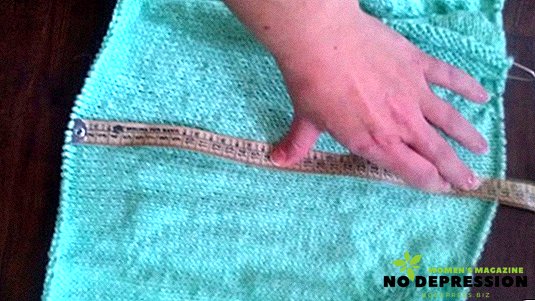
- We will continue to smooth the legs, taking measurements from a child (measurement + 3 cm). For a product of 68-74 cm in height: the length of the jumpsuit with such growth is about 56 cm; the length of the inner surface of the leg is about 20-22 cm; therefore, the height of the overall to the cut of the pants is 35 cm; It is necessary to make minimal indentations for the zipper (1 cm each).
- We knit 33 cm in a straight line.
- On the sides of the front row, add air loops.
- Four more rows of the front satin stitch, attach a clip or marker to the middle.
- We start gusset. To do this, from the mark start the first row with one subtraction at the beginning and end of the leg, knit the front row, then purl. In the third row, make two increments of 2 loops after the edge and up to the marker, the fourth - according to the figure. In the fifth - four on 2.
- 6th knit on the pattern. It will be so:
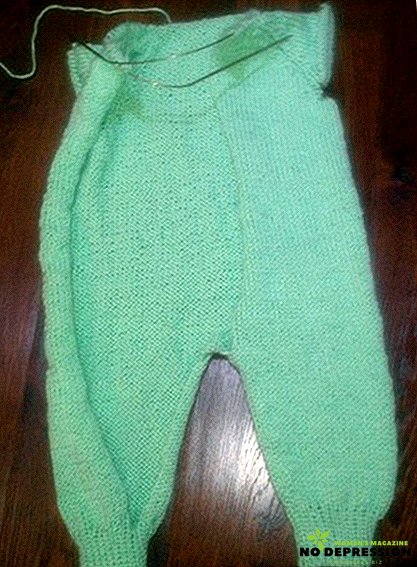
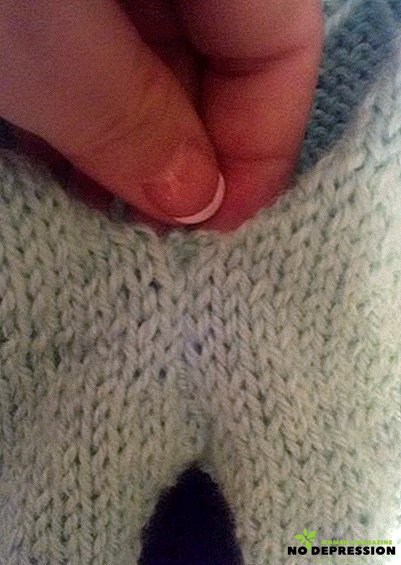
- On the seventh - close 4 loops. The resulting triangle forms a gusset.
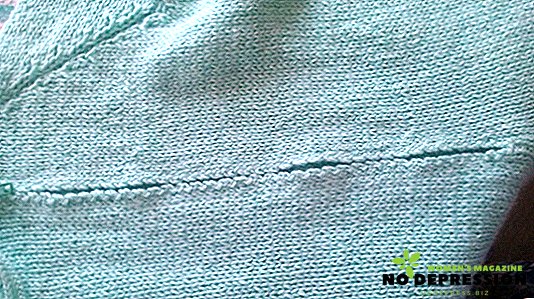
- Divide the product into two parts by the attached marker, then turn the knitting and proceed to knit the trousers separately, with the two outer loops take a crosswise to prevent the work from being pulled out.
- On the eighth row again close the four loops, on the ninth - the first two to knit in one, also on the tenth.
- The legs can be performed on five knitting needles or circular ones, so that there is no seam, you can knit with a cut and then sew. You can make narrow and straight wide pants. For a uniform bevel, subtract in even rows. For straight lines, reduce them directly in front of the cuff.
- Approximate variant of knitting the trouser leg: 30 rows of the surface, reduce four loops (two from the edges), go to the stocking knitting needles, then make another decrease, distribute 11 loops into four needles, make 11 more circular, then with an elastic band.
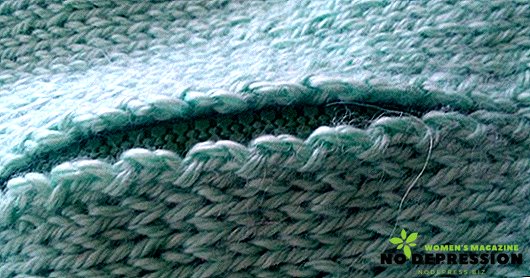
- Tie another leg, extend the seam to the deepening for the zipper.
- Flash the connection area.
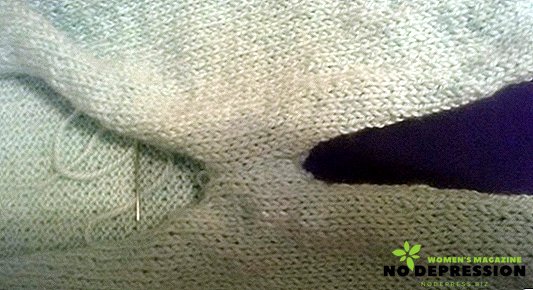

- View between the legs.
legs: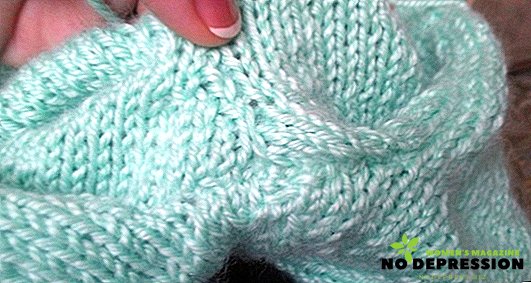
- Gusset view.
- Go to the knitting hood. To do this, the initial number of loops - 68 - is reduced to 61, you can make an elastic band 1 * 1, in the second and third row of which you can use holes and knit two to one holes in the second and third rows. In the fourth and fifth - close the first 5 loops, the rest to perform the satin, as in the photo.
- Make two rows of the surface, in the third and fourth tie the shortened 9 loops on the sides: edge, 8 face, 1 loop to remove without straps, wrap, the rest - purl. In the next row: edge, front and auxiliary nakid tie together with a loop, do the same with the wrong side. Perform another 6 lifts smoothing, repeating the shortened mating.
- The surface should be 17 cm.
- Separate knitting on the sides and the back of the head. Slow down the sides and follow the hood on the heels of the sock. The height of the hood should be 22 cm.
- Tie the hood, dial 94 loop at the edge.
- Run gum thickness of 5 cm 1 * 1, complete by closing the knitting.
- Bend the harness in half inside.
- Sew the bent bar to the edge of the hem.
- Connect with the recess.
- It turned out the drawstring, through which you can later skip the lace.
- Hood ready.
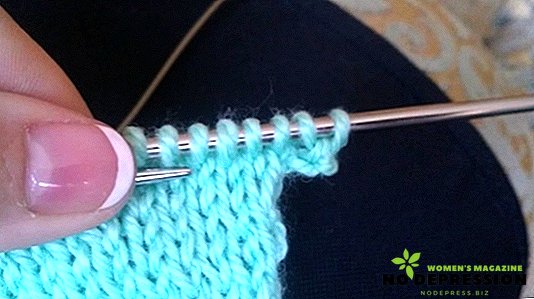
- Proceed to the sleeves. Get 6 loops to undercut.
- To make the sleeves look better, it’s worth completing the two loops at the very beginning.
- Before viscous cuff reduce 3 loops, cuffs to perform with an elastic band 1 * 1, 12 circles. Complete the last three full double viscous, close the machine.
- Procurement dovyazana.
- Sew a zipper.
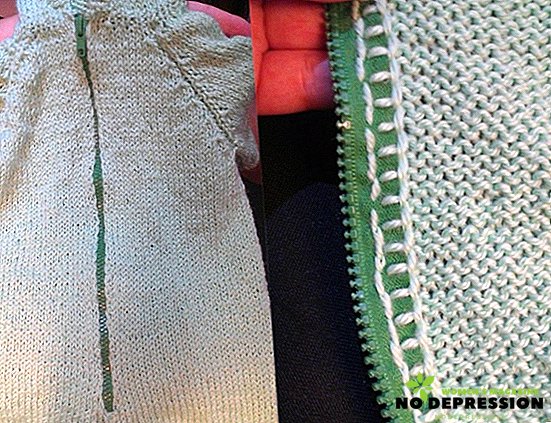
- Take the hook and tie up the connecting column, two air, repeat along the entire slot for the zipper.
- Tie three more air and a small square, which is sewn over the ends of the zipper so that it does not irritate the skin of the child’s neck.
- For ties, you can choose a string in the color of yarn. You can also crochet 50-75 cm, which is tucked into the drawstring.
- Heat treat overalls.
Finished tying. Left strings - crochet length 60-70 cm, skip in the drawstring.


With the help of the presented schemes, you can easily tie things for the baby, acting in steps. Using multicolored yarn, jewelry, you can create a truly unique thing.
And another small master class on knitting hats for the baby - in the next video.