It happens that it is necessary to urgently make a New Year crafts, a festive cap or interesting packaging for a gift. Then we think about how to make a cone. For those who have no idea what it is: a three-dimensional geometric figure with a round base. All the rays from the circle rise up at the same angle and intersect at the same point (vertex).
How to make a cone scan
To begin with, the full sweep of a cone consists of a base (circle) and a circular surface, unrolled into a sector (part of a circle). There are several different ways to build the required sweep, but at this point we will describe the easiest way of this build.
You will need:
- compass;
- a simple pencil or pen;
- ruler;
- A4 sheet;
- scissors.

Let's get to work:
- First you need to draw a circle.
- After that, divide it into 12 equal parts.
- Next, construct the side surface of the cone (circular sector). The radius of one such sector of the cone is equal to the length of the generatrix of the cone, and the arc length of the sector is equal to the length of the circle lying at the base of the cone.
- Then on the sector arc it is necessary to transfer 12 chords, which will determine its length and the angle of the circular sector. And to any point of the arc sector attach the base of the cone.
- After that through the points of intersection of the cone and the cylinder to carry out the generators.
- It is necessary to build the resulting generators on the scan.
Here we come to an end: you need to connect the characteristic points of intersection of the cone and cylinder on the scan.
How to make a cone of A4 paper
Details of any products sometimes have the form of a cone. For people who do not know how to make a cone, this delivers unnecessary trouble (for example, searching for step-by-step instructions or watching video tutorials). This item of the article will help you to remember once and for all how to make such an unusual figure.
You will need:
- ruler;
- a simple pencil or pen;
- scissors;
- A4 sheet;
- glue;
- compass.
Let's get to work:
- First you need to take an A4 sheet and use the ruler and pencil to mark the middle of the sheet.
- Next, put the sharp end of the compass to the point noted earlier, and draw a circle that does not extend beyond the sheet.
- Cut the circle with scissors along the drawn line.
- Draw a straight line from the center of the circle to any edge of the circle. To which edge to draw the line, it does not matter.
- Cut a circle along the line to the center.
- Fold the already cut sheet to the desired size and, if necessary, trim the edges.
- Glue the inner side of the inner and outer sheet to our rolled sheet.
How to make a cone of cardboard and paper for Christmas tree
In kindergartens and schools often require Christmas products for various competitions (for example, Christmas trees or New Year's composition with the presence of Christmas trees).
First, let's look at how to make the necessary figure from the drawing paper. You will need:
- whatman;
- a simple pencil or pen;
- ruler;
- thin rope, tape or strong thread;
- glue;
- scissors.
 We proceed to perform:
- First you need to take a paper. Its size is 60x84 cm. Divide the wide side of the drawing paper in half and mark the division point with a pencil on top (the mark should be at a distance of 42 cm from the edge).
- Then tie a pencil or a pen with a 1 meter long tape to a tape (thin rope or sturdy thread).
- Then press down the rope with your finger, where the mark, one end of the rope to pull off and set the pencil at the opposite edge of the drawing paper.
- After that, using the rope as a compass, draw a semicircle on the paper.
- Then cut this semicircle.
- It is necessary to bend into the chieftain from one of the sides in a straight line connecting the point of the mark on top and the end of the circle on the side.
- Then roll up the workpiece in the form of a cone, releasing the curved end from above. Now you can adjust the size of the resulting shape - more or less, twisting it.
- You can apply glue on the edge of the curved end of the drawman and glue it.
Now let's see how to make the necessary figure from cardboard. You will need:
- pencil or pen;
- ruler;
- compass;
- scissors;
- PVA glue, tape or stapler.
Let's get to work:
- First you need to take a sheet of cardboard. With a compass draw a circle of any diameter and cut it. The height of the cone is closely related to the radius of the circle: the wider the radius, the higher the figure will be.
- Now you need to cut a sector of a circle: divide the circle into 4 equal parts with a pencil and a ruler or fold it in half vertically and horizontally, you get 4 folds.
- Cut off one of four parts (one sector of a circle).
- Then we fold the blank into a cone and fix the side edges with a stapler, tape or glue.
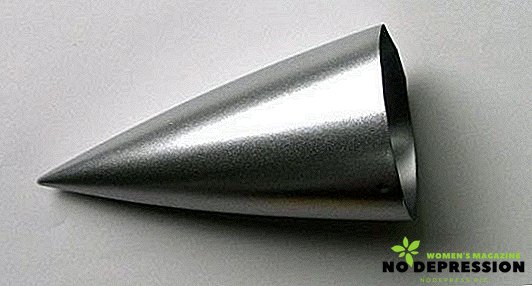
Now the figure made by us can be decorated with something (for example, rhinestones, ribbons, paper) and used as you like. Also do not forget that the cone itself can be made not only from a simple white sheet.