Design interpretations have spread literally to every little thing. Standard classic items are becoming fashionable ideas and objects for the realization of fantasy. One example is an envelope.
What can be special about it? A sheet of paper folded in a specific order. Yes, and how can it be applicable, in addition to the mail? There are options! These are decorative “reservoirs” in which they give presents, store memorabilia, transfer money, in the end.
It is of great importance in what form a person will receive a gift for a birthday or a new year. Even if the envelope is an inexpensive trinket or a symbolic amount, the design itself, made with your own hands, will give you a lot of pleasant impressions.
How to make a simple envelope from a sheet of paper
Classic example. It is carried out both on usual white paper, and on color. It does not stand out and is most often used to create a kind of "money bag". If you have to pay for the session, then it is better to do it with minimal cost.
What you need:
- paper. Smooth, clean sheet;
- glue. PVA or pencil - what do you have;
- scissors, ruler, simple pencil and eraser.
If you have perfect vision and are able to measure the distance without additional means, you can refuse from the ruler.
But remember, if you do not observe the proportions and fold "by eye", it will turn out crooked, obliquely and ugly.
Sequencing:
- Cut a sheet of paper to form a square.
- On the side that will be the inside of the envelope, determine the center. To do this, using a ruler, draw a thin barely noticeable diagonal. The place of their intersection is the center.
- Two opposite corners of the square bend, making the ends in the center. Push the fold line well, fixing the position.
- Fold the third corner. The bottom of the lower triangle will be the bottom of the envelope. To avoid cracks, the fold line should be slightly above the lower corners of the side triangles. Thus, the upper corner of the lower triangle will be slightly above the center. Push through the fold lines.
- Open the "envelope" and erase the diagonal with an eraser.
- Collect the envelope, bending the protruding edge of the lower triangle inward - it should be flush with the center. Glue around the perimeter of the lower triangle. Advice - it is better to use glue stick. From it the paper will not swell and change shape.
- Fold the "cover" - the angle should reach the bottom of the envelope. Push the fold line well. Done!

How to make an envelope from paper for writing with your own hands
If you intend to send a letter by mail, consider the fact that postal envelopes have certain dimensions and weight, therefore, not complying with the standard will lead to the fact that the letter may not reach the addressee. It is better to clarify the details in the mail.
The tools are the same: paper, scissors, glue, ruler, pencil and eraser.
Sequencing:
- Take a sheet of A4 paper. Measure in centimeters from wide sides and bend. Along the sheet turned out a kind of a turn.
- Measure along the fold line 10 cm from one edge and bend. Formed not glued pocket and a very long tongue.
- Measure 2 cm from the base of the tongue and cut off the extra length. Round the edges.
- Open the "envelope". Glue the turn of the longer part to the main sheet.
- Spread the glue on the outer side of the short section of the gate and glue it to the long. The envelope is ready.

How to make a large envelope from A4 paper
The easiest and fastest method. You will need A4 sheet, glue, scissors and a ruler. Paper may be white or colored.
- Measure out on the wide side on the right below and on the left above on 7.2 cm. Draw lines to the corners up and down, respectively.
- Cut off the formed triangles. Diamond leave triangles throw.
- The left and right corner of the diamond bend inward, leaving a distance of about 7 mm between them.
- Fold the bottom corner so that there are no gaps. Smear with glue on the lower sides of the side triangles and glue to the bottom. Is done.

How to make a paper envelope for money without glue
The simplest method, which does not require any additional items, except paper is an envelope with a small square. The finished result will be small and with an unusual clasp. The A4 format is considered as an example, but other dimensions can be used. You can use both colored and white paper.
- A short moan of sheet to attach to a long. A triangle is formed. We press the fold line. Cut off the excess part of the sheet - a rectangular single-layer area.
- Expand the triangle base to itself. Bend down the upper corner. The tip should touch the base. We press the fold line.
- Right side bend inward.
- Fold the left side inward.
- The edge of the left side is bent in the opposite direction. The fold line runs in the middle of the base.
- The resulting "tail" open in the pocket.
- Fold the pocket in a square.
- Is done. It remains to bend the upper part and fill the tip into a square pocket.

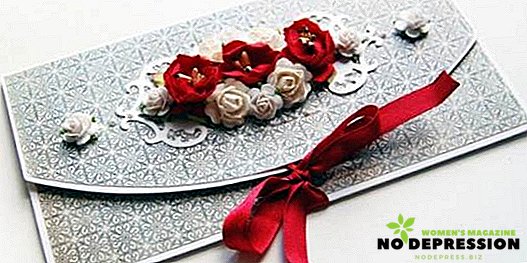
A more elaborate and time-consuming option is to use a tape.
Such envelopes, as a rule, are not limited to only colored paper. They are additionally decorated with twisted patterns, beads, glitter. It is customary to use patterned stencils for cutting out shapes. Instead of standard paper is used more dense. For example - thin cardboard.
The scheme is simple:
- stencil cut;
- in the places indicated by black stripes, slots are made under the tape;
- The envelope is pressed through the main lines (the perimeter of the inner square) and is collected - the upper and lower parts are internal, and the side - external. You can put money;
- the tape is placed under the product and inserted through the slot. Tied on the front side. Done!

How to make a beautiful paper envelope
Antique
It will take: a sheet of paper, a wax candle, a wide brush, coffee or tea, signet.
Sequencing:
- Fold a simple envelope out of paper. Do not glue.
- Expand it and paint over a cup of strong black tea or coffee with a brush. Let it dry.
- Fold and glue the envelope, leaving the "cover" free. Put a gift / letter.
- Bend the lid, push the fold line well and press the tip against the envelope. To drip wax and extrude the seal. Done!

As a print, you can use any available tools. For example - caps from cosmetics or carved wine corks. Wax candles are easy to replace with paraffin or pistol glue, which comes in a variety of colors.
With the seamy side
To create it you will need:
- ready-made envelope stencil;
- monophonic, double-sided colored paper under the envelope itself;
- colored backing paper. On the wrong side will require significantly less paper. In addition, it should stand out brightly against the background of the main one.
Sequencing:
- Cut envelope on the stencil.
- Fold it by pushing the fold lines, but do not glue them together.
- In the form of an envelope cut out the wrong side.
- Glue it into the inside of the envelope. Assemble it and glue it.
Done!

Little box
Materials:
- thick paper (scrap, cardboard);
- scissors or office knife;
- glue;
- round shape (most conveniently - CD / DVD discs);
- decor (ribbon).
Sequencing:
- Cut 4 circles using discs for tracing. Each circle bend in half.
- Spread glue ¼ of each circle in the same place.
- To glue the circles, on the principle of closing the cardboard box. Give dry.
- To put a gift, to close an envelope by the principle of a cardboard box and to decorate with a decor - to tie up a ribbon.
Done!

More simple, but no less cute envelopes - decorated with decorative animals or flowers. It is not necessary to strive to achieve ideal forms - clumsy penguins cut from ordinary colored paper look much more charming than the highest quilling technique.
A standard white envelope is decorated with ribbons, lace, drawings of various forms through stencils and turns into a unique packaging.
An envelope of paper with their own hands - beautiful, simple, unique and touching. Moreover, this gift wrapping option is acceptable for children. Scarce will be proud to do it yourself, and mom will be able to be touched and show off to her friends for months.
Another idea for making a paper envelope is in the next video.