Become the owner of a beautiful and well-groomed nails can any girl, it does not necessarily go to expensive salons. You can grow them yourself. Having everything you need in your arsenal, it’s easy to handle.
At first, everything will not be clear, but experience will be gained with each nail. You can increase them not only to herself, but also to her friends.
For some, it can be a profitable business, and someone just wants to save. Working with nails is creative and interesting, the result will delight every time. Having become acquainted with the following principles of extension, there will be no problems with this procedure.
How to quickly learn how to grow nails at home
Those who have no idea how to build up their nails, it will be useful to learn how others do it. You need to start with one nail. The main thing is to understand the essence, the rest is a matter of time and technology.
- practicing regularly building, you can learn how to make a spectacular manicure in a short time;
- in order to avoid unpleasant surprises, you need to thoroughly examine everything;
- prepare the necessary equipment for building and materials.
It is necessary to think about which building technique to use - gel or acrylic. Each species has its own characteristics, which one is suitable - you decide. The principles of modeling gel and acrylic nails are different. It is difficult to select which option is better - it all depends on individual preferences.
The difference between extension techniques lies in the process of solidification. Acryl is polymerized by mixing the powder with the monomer, and the gel hardens under the influence of ultraviolet rays.
According to the masters of the nail industry, it is easier for beginners to work with the gel.
While acrylic, allows you to achieve clear shapes and lines.
Each type of building has its pros and cons. The lack of an acrylic system is a strong odor of monomer. Gel in this plan is in the lead. If you compare the cost part of the materials for gel building, you will need to additionally purchase a lamp for the polymerization of nails.

Materials and tools for nail
If you have decided to learn the art of modeling marigolds, you will need to acquire funds depending on the building system. And in order to not miss anything, you must prepare a list in advance.
For beginners at first, it is not necessary to buy expensive funds. A standard acrylic or gel set of an average price category will suffice. Also need:
- cuticle sticks;
- nail files with different abrasiveness;
- forms for acrylic;
- tips and glue for the gel;
- brushes for modeling;
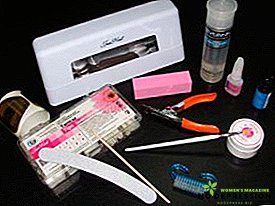
- lint-free napkins for manicure;
- tweezers and scissors;
- glass for monomer;
- disinfectant,
- primer;
- monomer;
- acrylic Powder;
- one or three phase gel system;
- topcoat;
- means for removing the sticky gel layer;
- UV lamp for gel.

Contrary to the mistaken opinion about the harmfulness of building. It is worth noting that those days are over when toxic materials are more common on the market.
Today, they were replaced by modern materials that do not damage the nail plate. If simultaneously with the build-up to master the nail art, you will additionally need to prepare materials for the design. You need a milling cutter for correction.
How to grow nails at home gel
Step-by-step instruction:
- Prepare the nails. Trim them, cut them and lightly polish them with a nail file to remove the grease film.
- Move the cuticle with a stick, treat the nail with a degreasing agent.
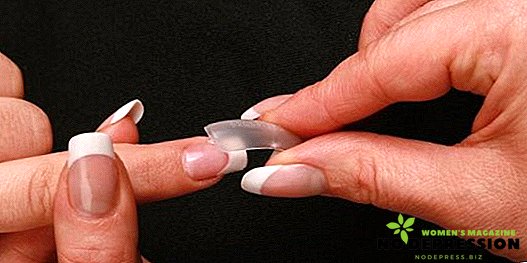
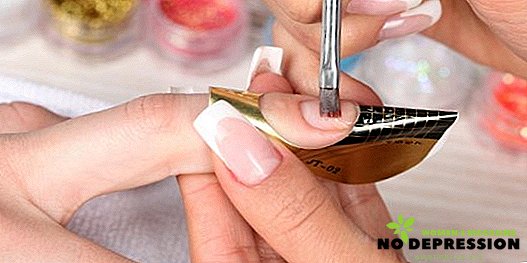
- Prepare tips or forms for gel building. In the case of tips, they need to stick on the edge of the nail. The form is attached to the edge of the nail plate and fixed with an adhesive base.
- Tips will need to be sawn to the desired length, remove dust from them.
- Treat the nails with a primer, allow to dry. Then you can apply a layer of base gel.
- Place the arm with the gel in a polemic lamp for 1-2 minutes. So do with every nail.
- The next layer is applied constructive gel. Now you need to simulate a nail, observing its architecture. Then put in the lamp for 2-3 minutes.
- The next step is to remove the sticky layer with a lint-free cloth.
- Fill, apply the final gel. Dry again in the lamp for 2-3 minutes.
- We polish the nails which are increased by gel. We bring to perfection and cover with a layer of varnish. Cuticle can be lubricated with cosmetic oil.

How can I grow nails acrylic at home
Step-by-step instruction:
- Trim your own nails, move the cuticle with a stick. Saw the edges and slightly sand the plate.
- Treat the nails with a primer. Let it dry.
- Put on paper or reusable forms so that they fit snugly to the nail.
- Measure out the cup monomer. Prepare a brush, powder and a napkin.
- Dip a brush into the monomer, remove excess liquid. Then brush the powder to form a ball of acrylic on it.
- The resulting ball put on the form, simulate the length of the future of the marigold.
- We continue the procedure until everything is modeled. First on one, then on the other hand.
- The hardening time of acrylic depends on its type, it happens - quickly, medium and long-drying. Quick-drying option at first is better not to take.
- The degree of hardening can be checked with a stick, just knock on the nail.
- Next, remove the forms neatly, file, oshkurit polishing file. Lubricate cuticle with cosmetic oil, apply varnish.

If after filing on the nails there are pits and flaws, you can apply a layer of acrylic on top, dry it and polish it.
Learn to build nails without gel and acrylic at home
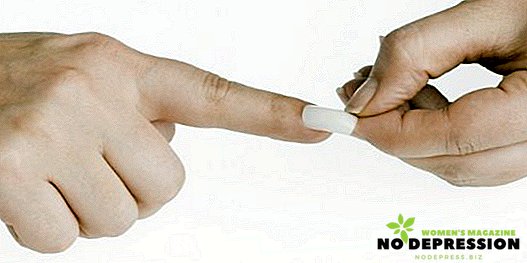
You can make beautiful nails without using gel and acrylic. For this you will need: tips, glue, tools for manicure and auxiliary fluids.
- Lightly sanded and sawed nails. Prepare according to their size tips. Try on how they will look.
- Apply glue to tips, apply to nail. Gently press the clutch to occur.
- If there is a primer or any degreaser, apply nails to them before gluing.
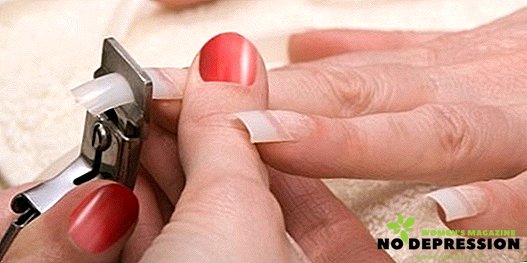
- Cut glued tips to the desired length, cut the edges, give them the desired shape.
- Varnish and fixative. If the tips are taken with a pattern, they should be covered with a clear varnish on top.

These nails will help out, if it is very urgent to modify them. However, they will not last long, a maximum of 2-4 days.
Nail care after building
No matter how skillfully the nails are enlarged, they require careful handling. We'll have to change some habits so as not to break them.
Otherwise, they will bring a lot of positive, they will not need to constantly paint. From correction to correction, the manicure will look perfect. Observing some rules for care, problems with their wearing will not arise.
To ensure proper care for your own nails, they can be greased inside with products that contain calcium, proteins and gelatin.
It is very useful to make nail baths with herbal broths. Water for baths do not too hot. High temperatures can cause deformation of extended nails. This advice will be very important for sauna lovers. Accuracy when wearing them does not hurt.
Contraindications to build up
Do not rely on the opinion that for the sake of beauty you need to sacrifice something. If present, any contraindications for building up can be harmful to health.
Therefore, it is important to know to whom they can be increased, and to whom it is categorically forbidden. In the presence of diseases, it is better to wait for complete recovery before thinking about artificial nails.
The case is not so much in the harm of the procedure, but in the fact that for a number of factors artificial nails will not hold. The risk of losing them after a couple of days is too great. List of contraindications:
- diabetes;
- herpes with localization on the hands;
- diseases of the cardiovascular system;
- circulation problems;
- hormonal disorders;
- chemotherapy for oncology;
- allergic to buildup components;
- pregnancy;
- contraindications for health reasons;
- with injuries of fingers, nails;
- fungal and viral lesions.
Here are the possible contraindications, which are best followed during the home building, so as not to damage the natural nails. The presence of certain diseases is not a reason to refuse acrylic or gel nails. It is just that in some cases it will be necessary to make corrections more often, because their exfoliation may occur.
The process of nail extension is shown in great detail in the following video.